mirror of
https://github.com/Sevichecc/Urara-Blog.git
synced 2025-04-30 21:49:30 +08:00
88 lines
4.1 KiB
Markdown
88 lines
4.1 KiB
Markdown
---
|
||
title: Contabo OSS + PicGo 图床配置
|
||
created: 2022-05-30
|
||
summary: OSS自建图床笔记
|
||
tags:
|
||
- OSS
|
||
---
|
||
|
||
## 1. 购买套餐
|
||
|
||
在官网购买 OSS 套餐,按月付费:[Object Storage: S3-Compatible with Free Data Transfer](https://contabo.com/en/object-storage/)
|
||
|
||
我没有修改设置,选的 250G 的容量,位于美国
|
||
|
||
## 2. 创建 Bucket
|
||
|
||
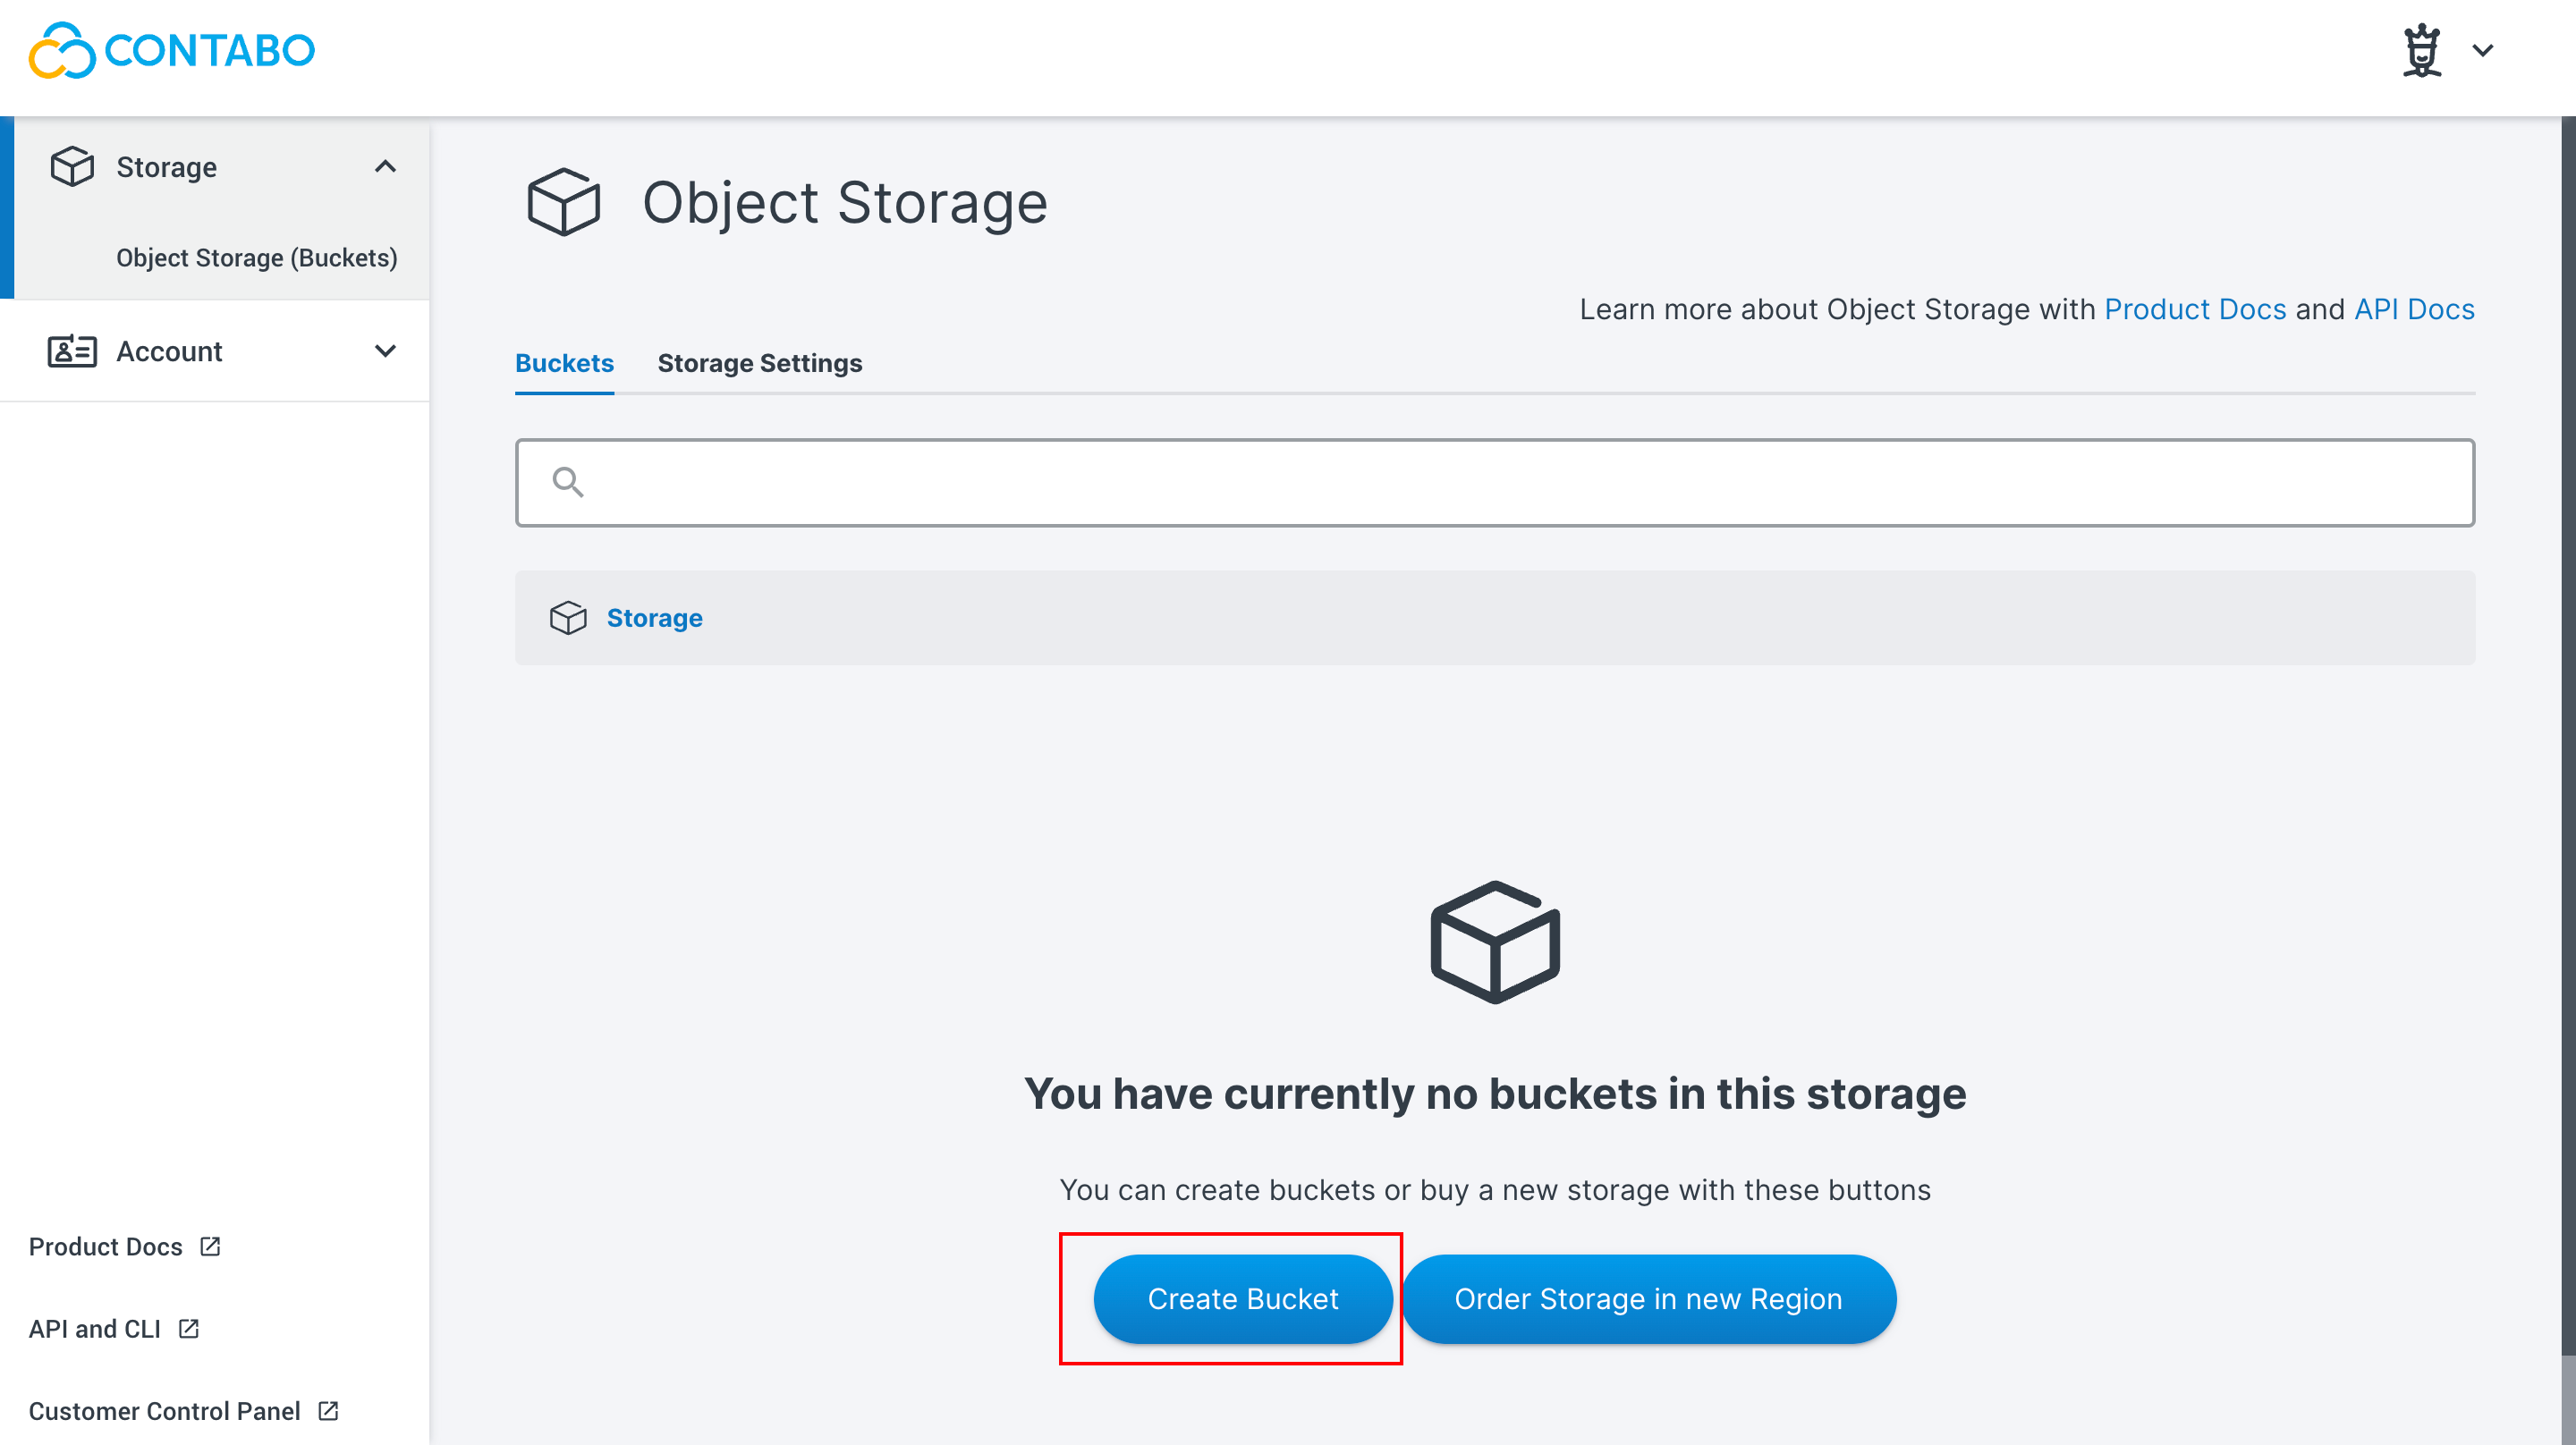
进入控制面板:[Contabo Object Storage Panel](https://new.contabo.com/storage/object-storage/buckets),然后点击`Create Bucket` 创建存储桶
|
||
|
||
|
||
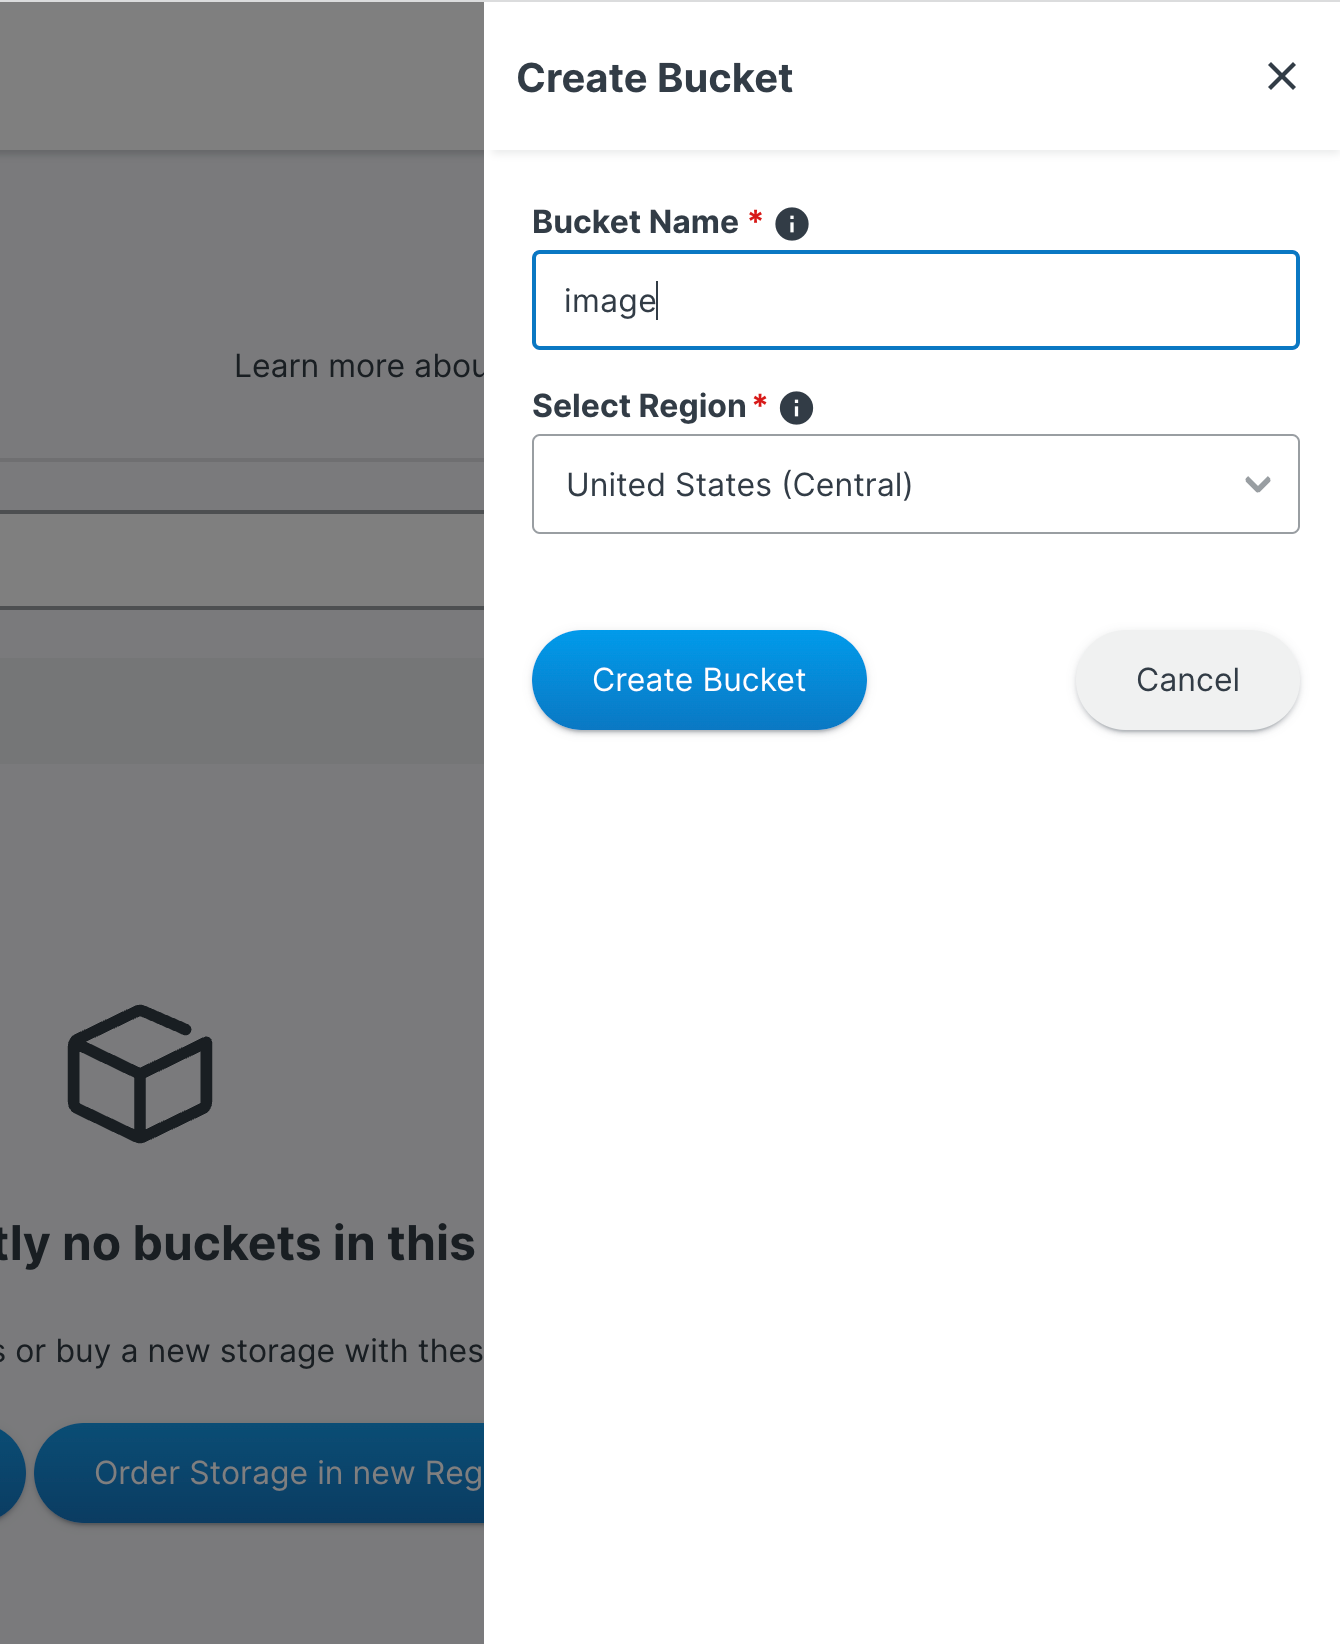
其中 **Bucket Name** 可以随便写,**Select Region** 不用选,默认是购买 OSS 时所选择的区域,如果换区域也可以另选
|
||
|
||
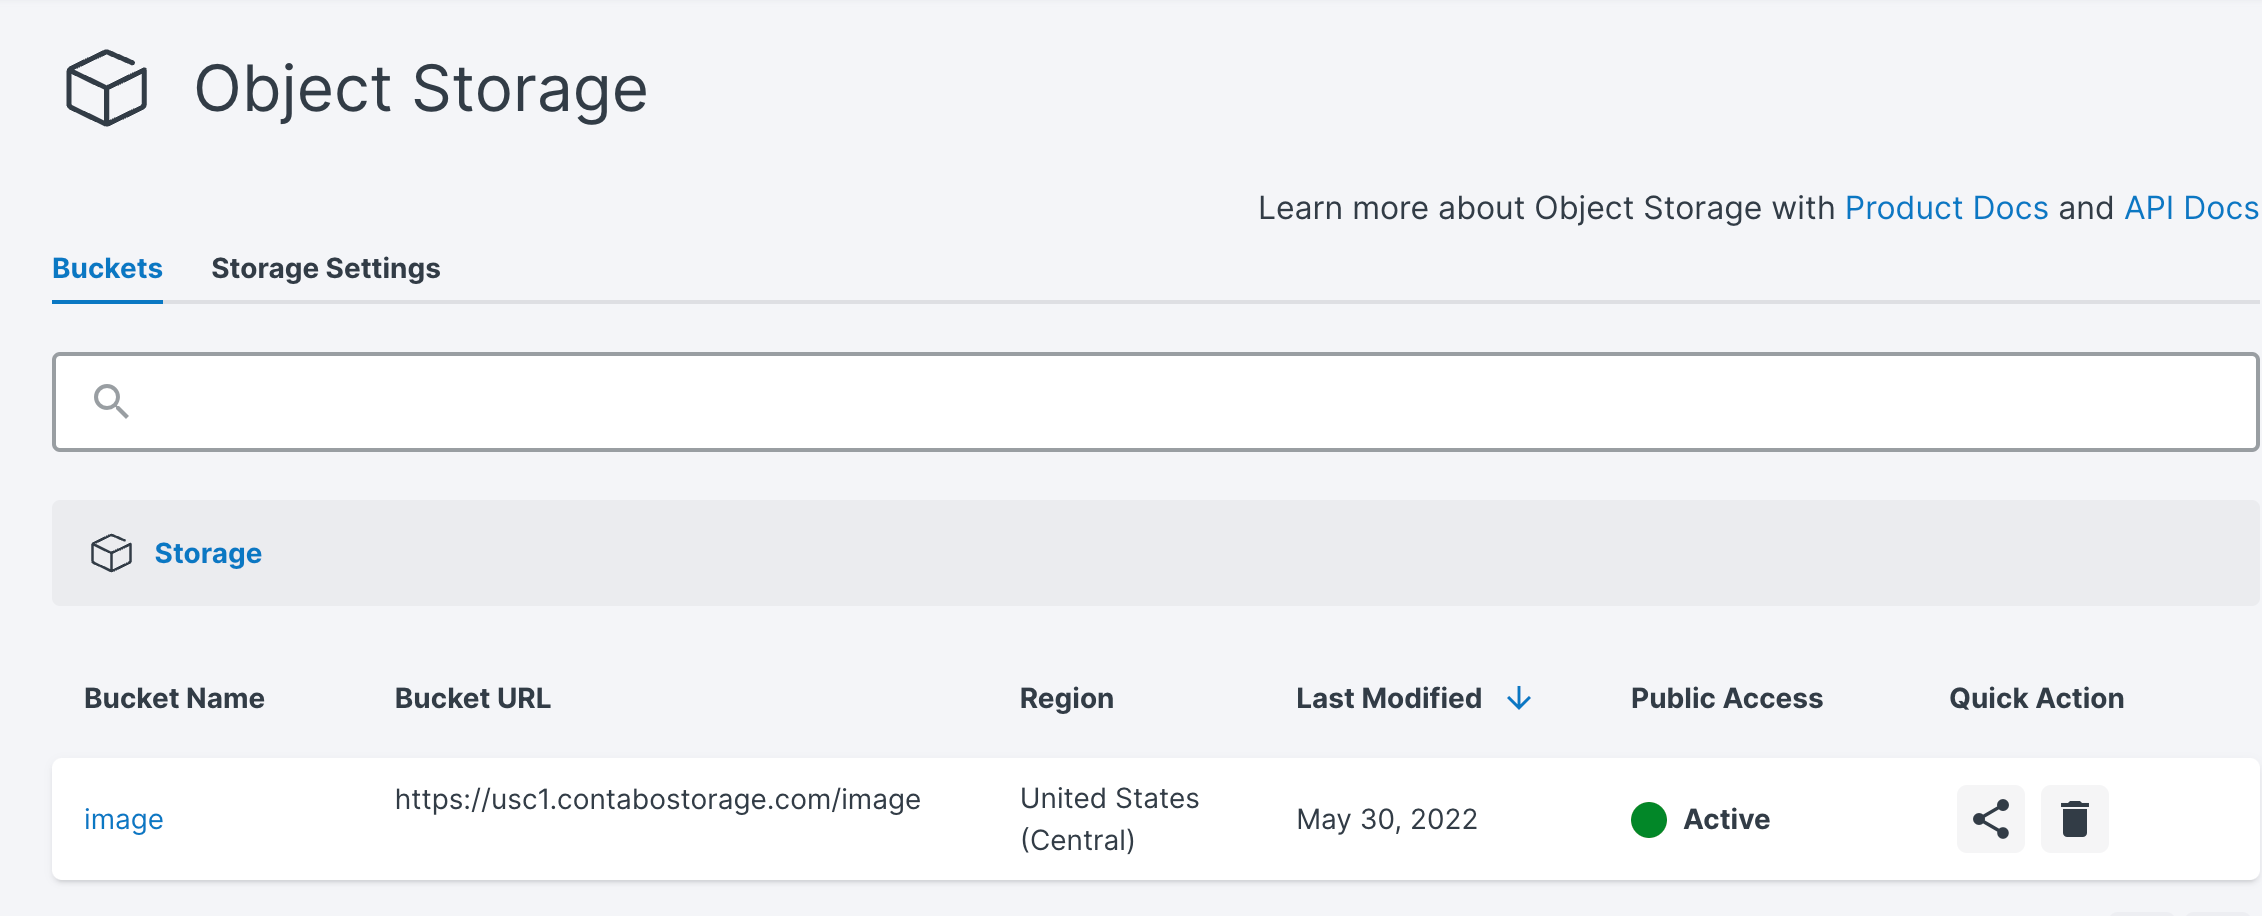
创建好后如图:
|
||
(这个 Public Access 应该默认是红色的,也就是没有打开,我这里打开了)
|
||
|
||
|
||
## 3. 安装 PicGo 插件
|
||
|
||
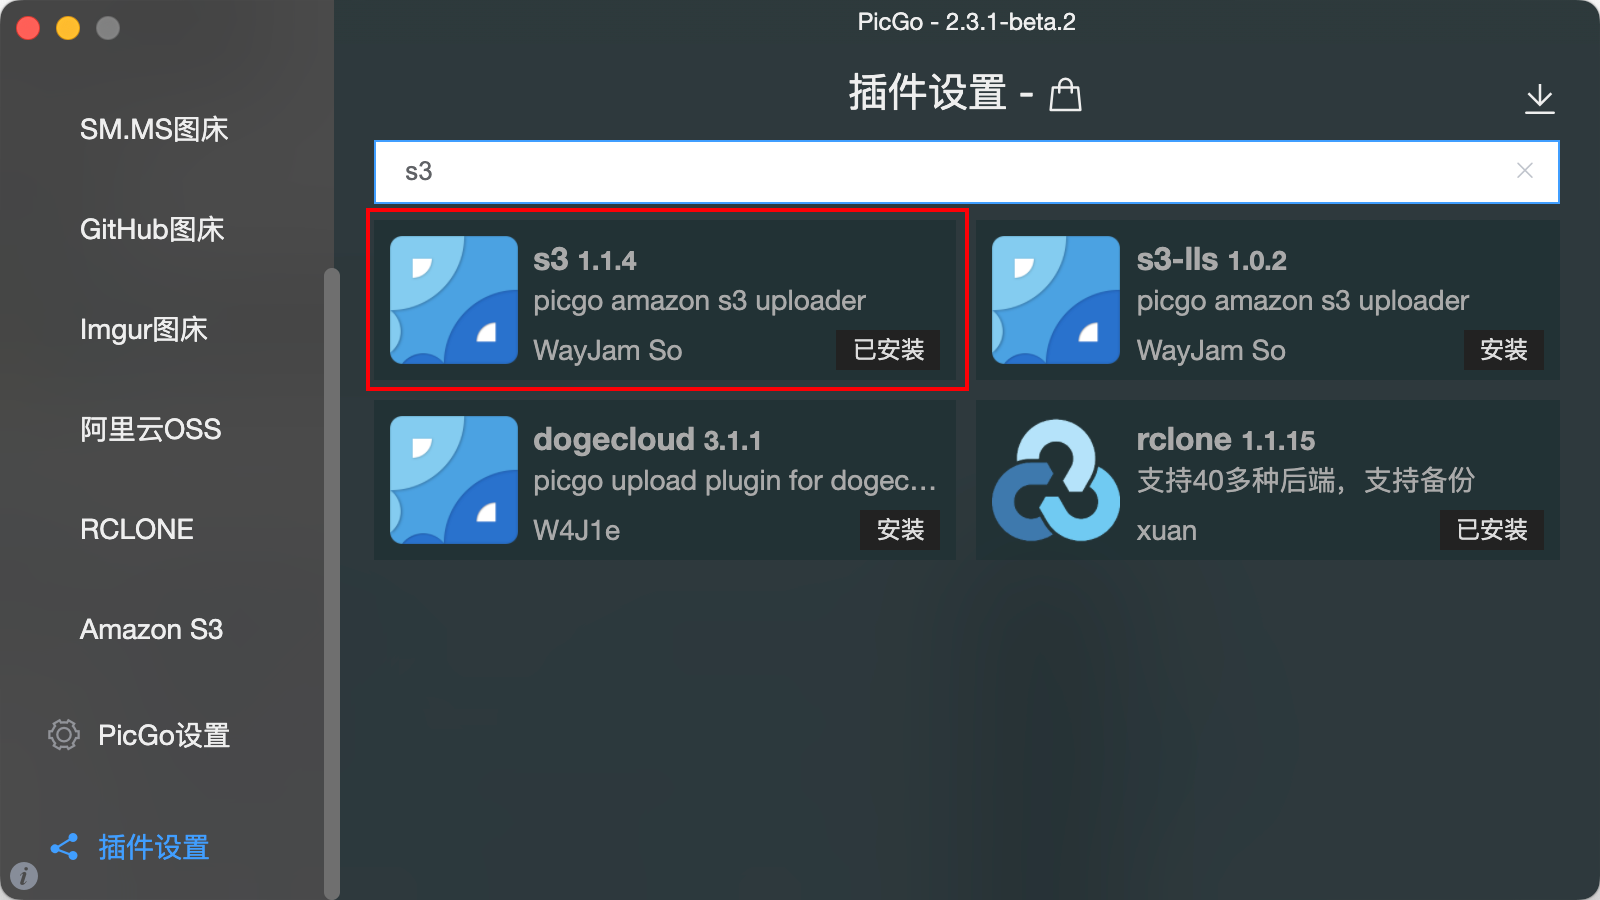
在插件里面搜`s3`,然后安装第一个:
|
||
|
||
|
||
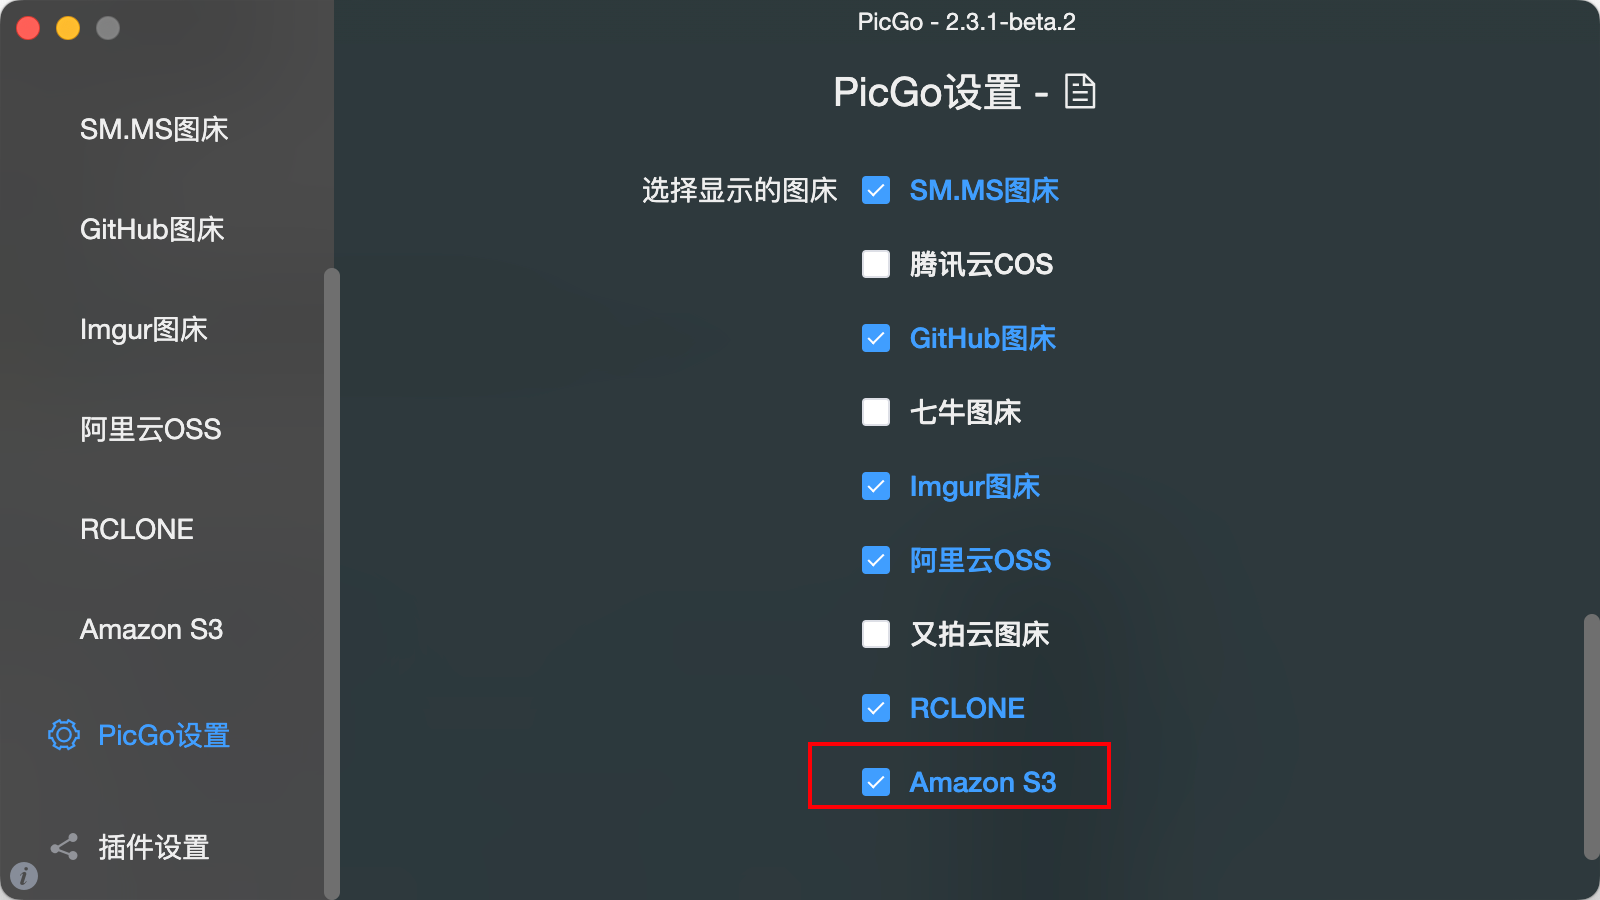
安装好后,在设置里选择打开,
|
||
|
||
|
||
## 4. 配置插件
|
||
|
||
|
||
|
||
### 应用密钥 ID 和 应用密钥
|
||
|
||
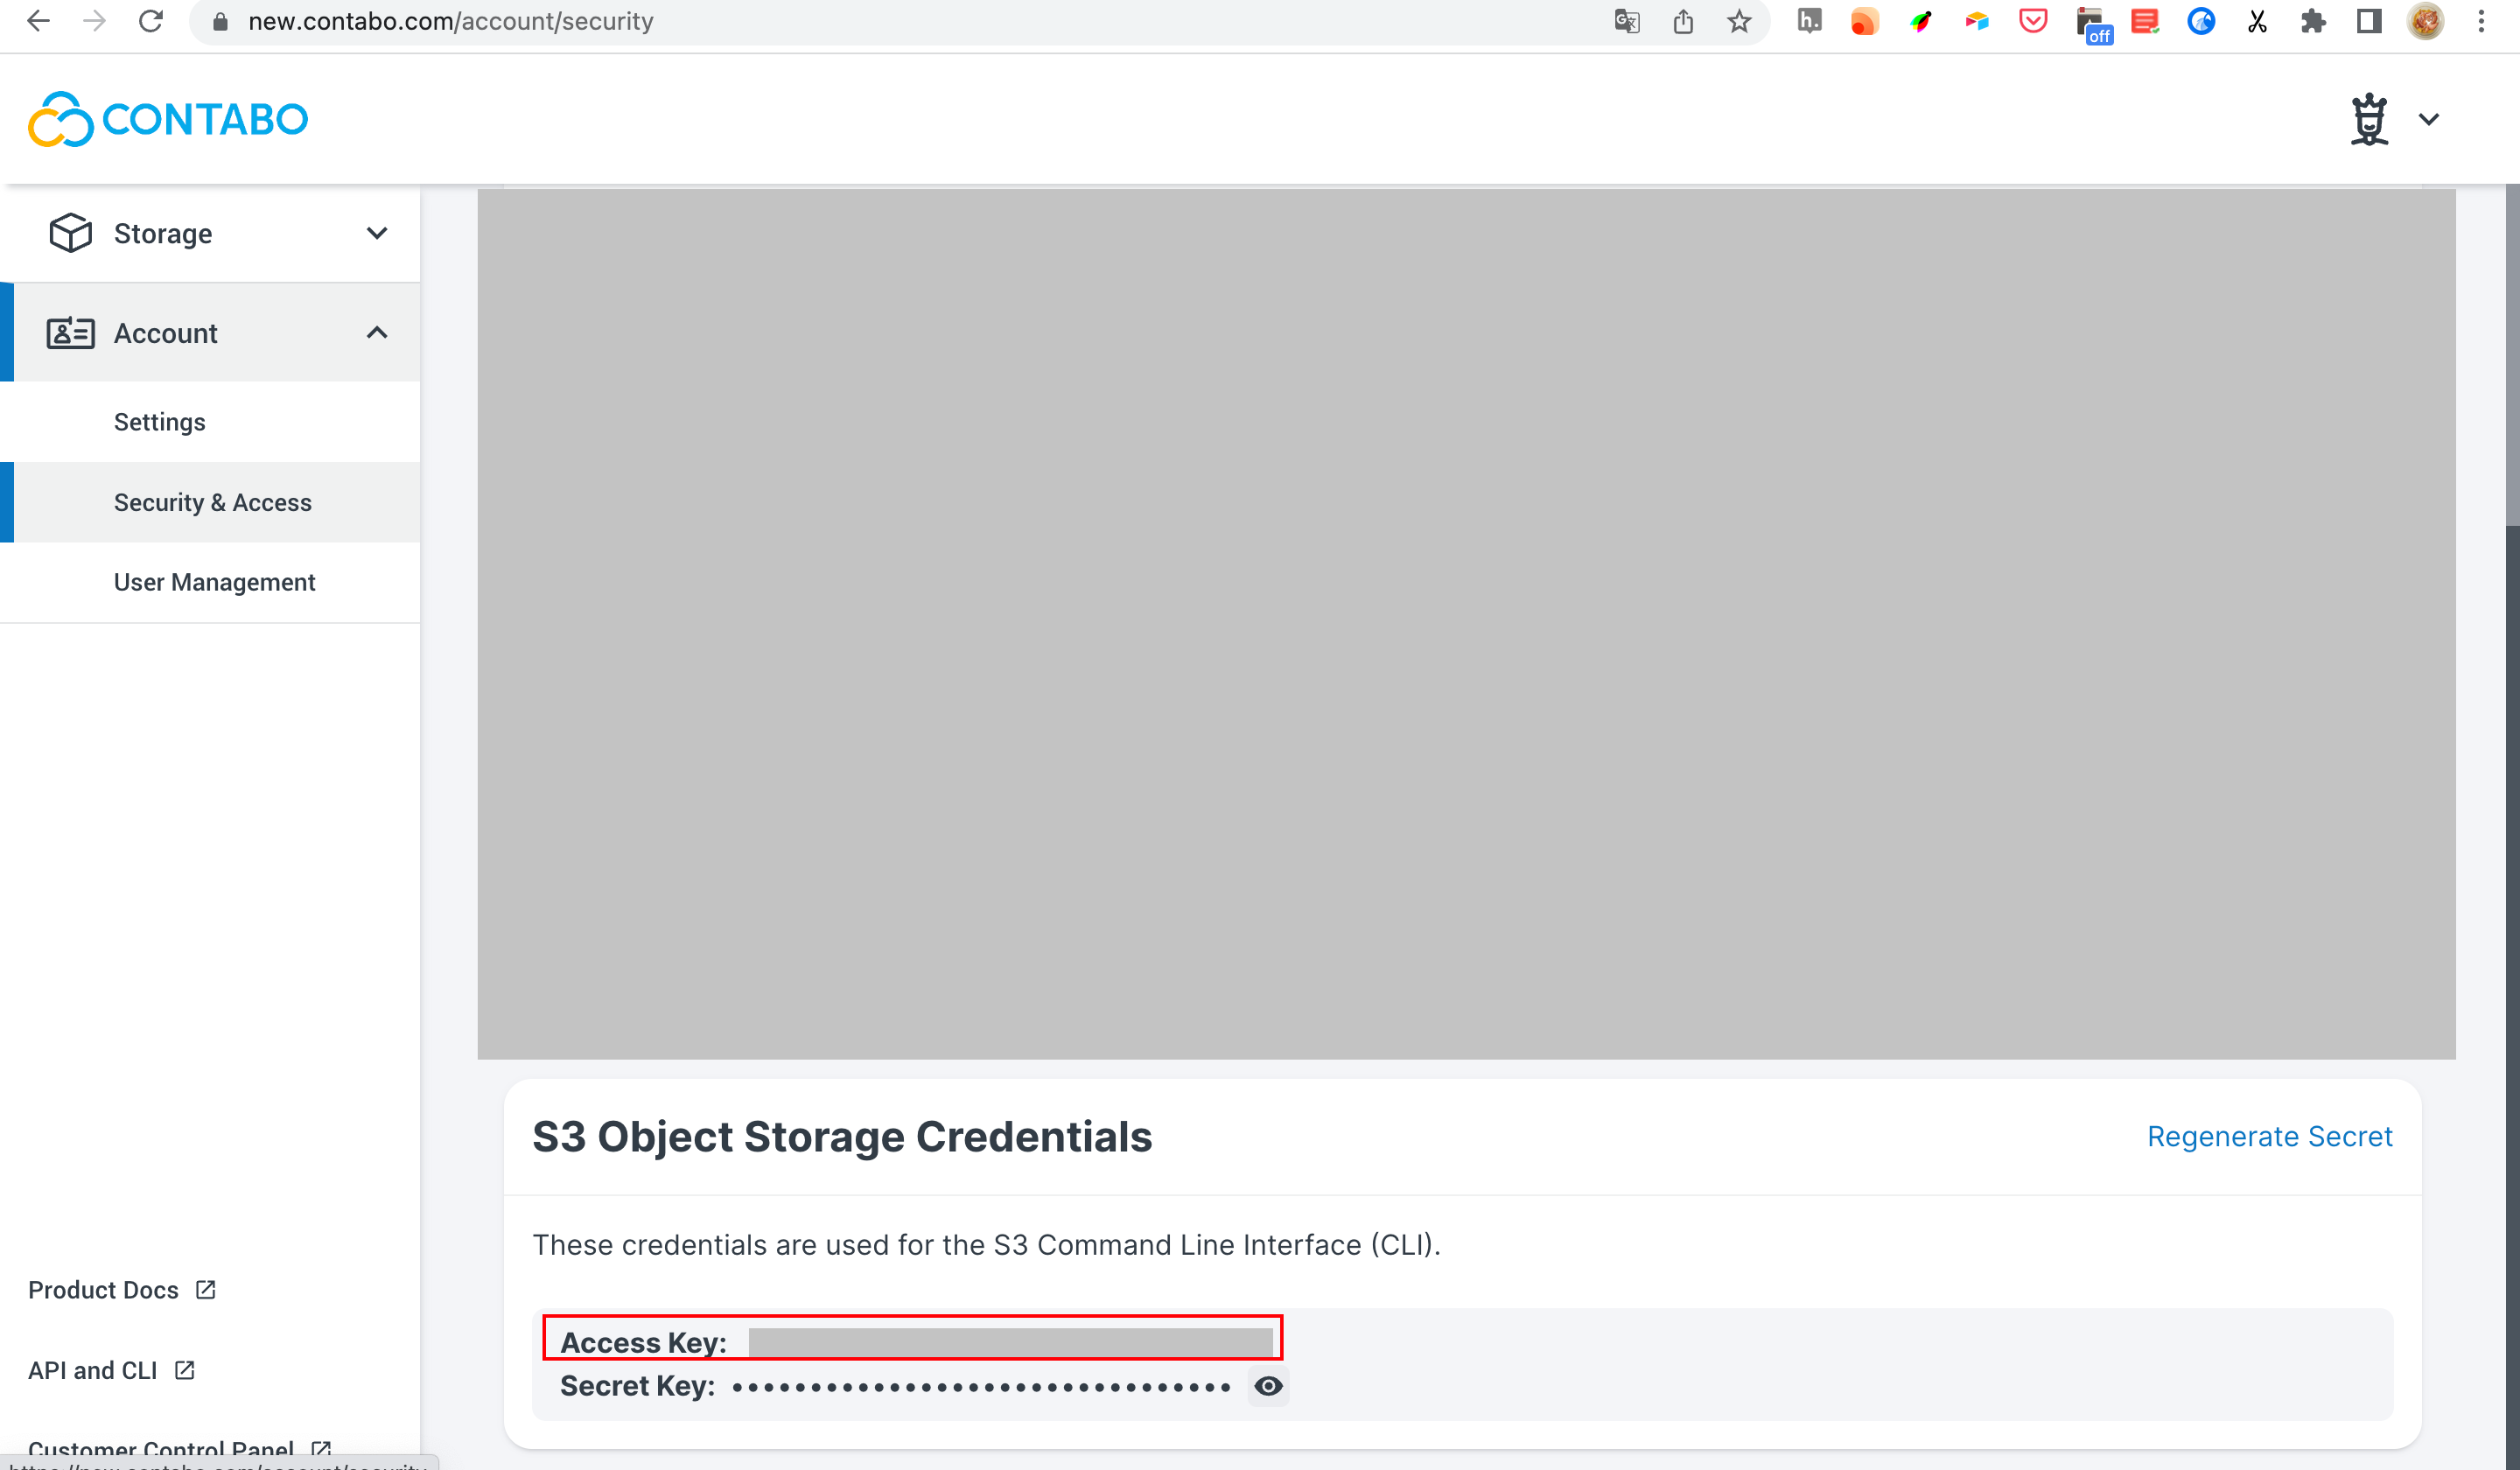
打开[Contabo Object Storage Panel](https://new.contabo.com/account/security)的 **Acount** > **Security & Access** 面板,找到最下面的 **S3 Object Storage Credentials**
|
||
|
||
这里对应插件设置里的:
|
||
|
||
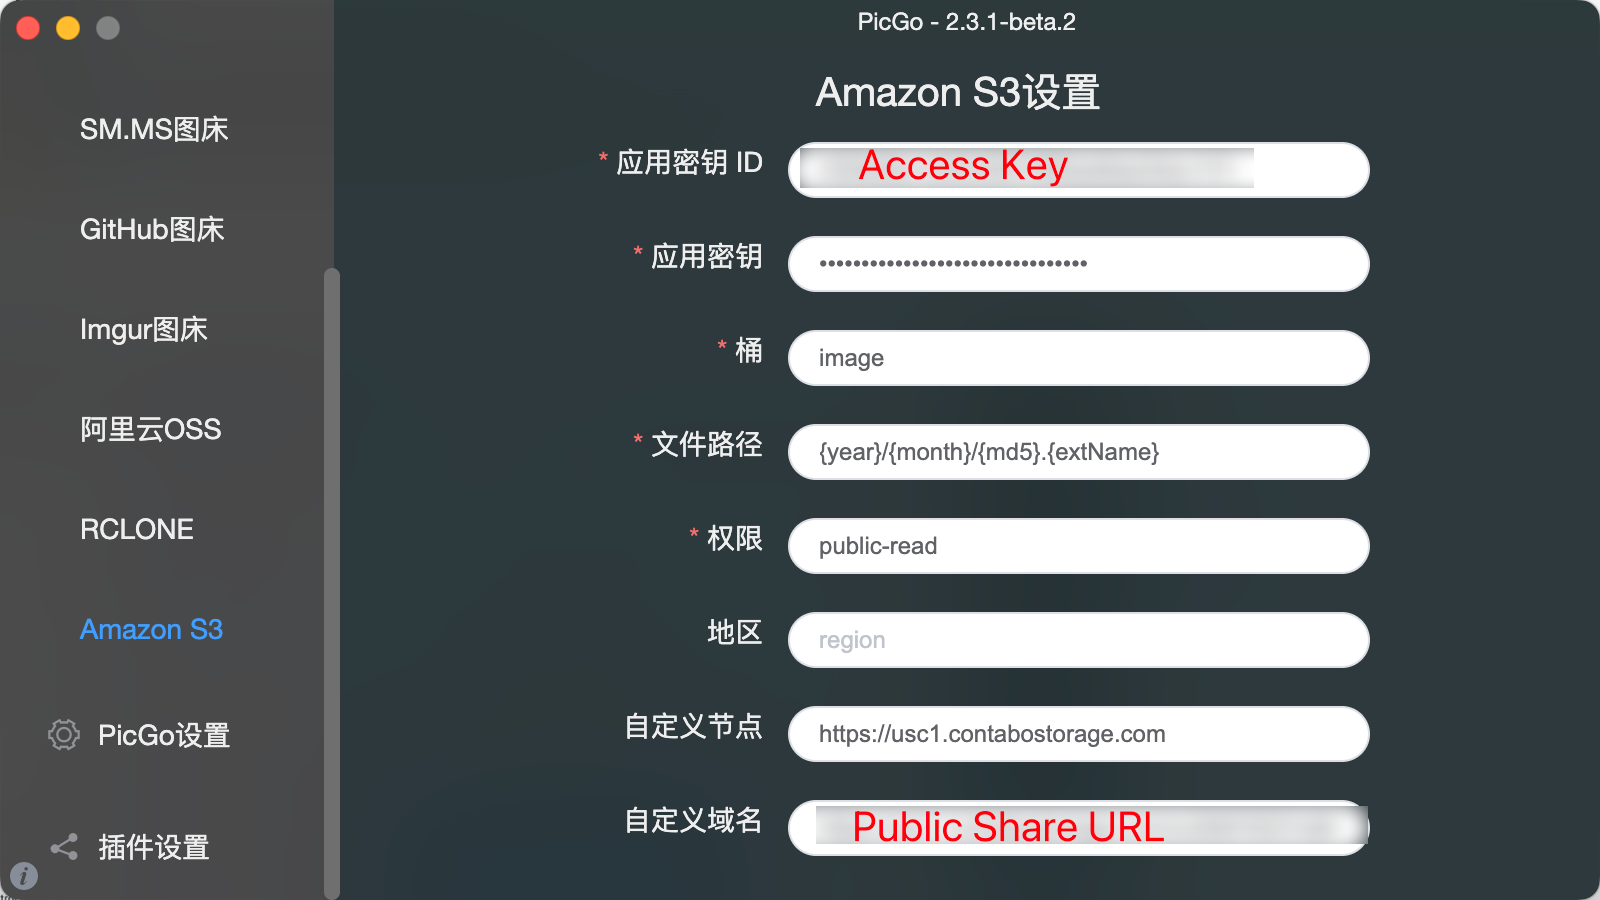
- **应用密钥 ID** → **Access Key**
|
||
- **应用密钥** → **Secret Key**
|
||
|
||
|
||
### 桶 / 自定义节点 /自定义域名
|
||
|
||
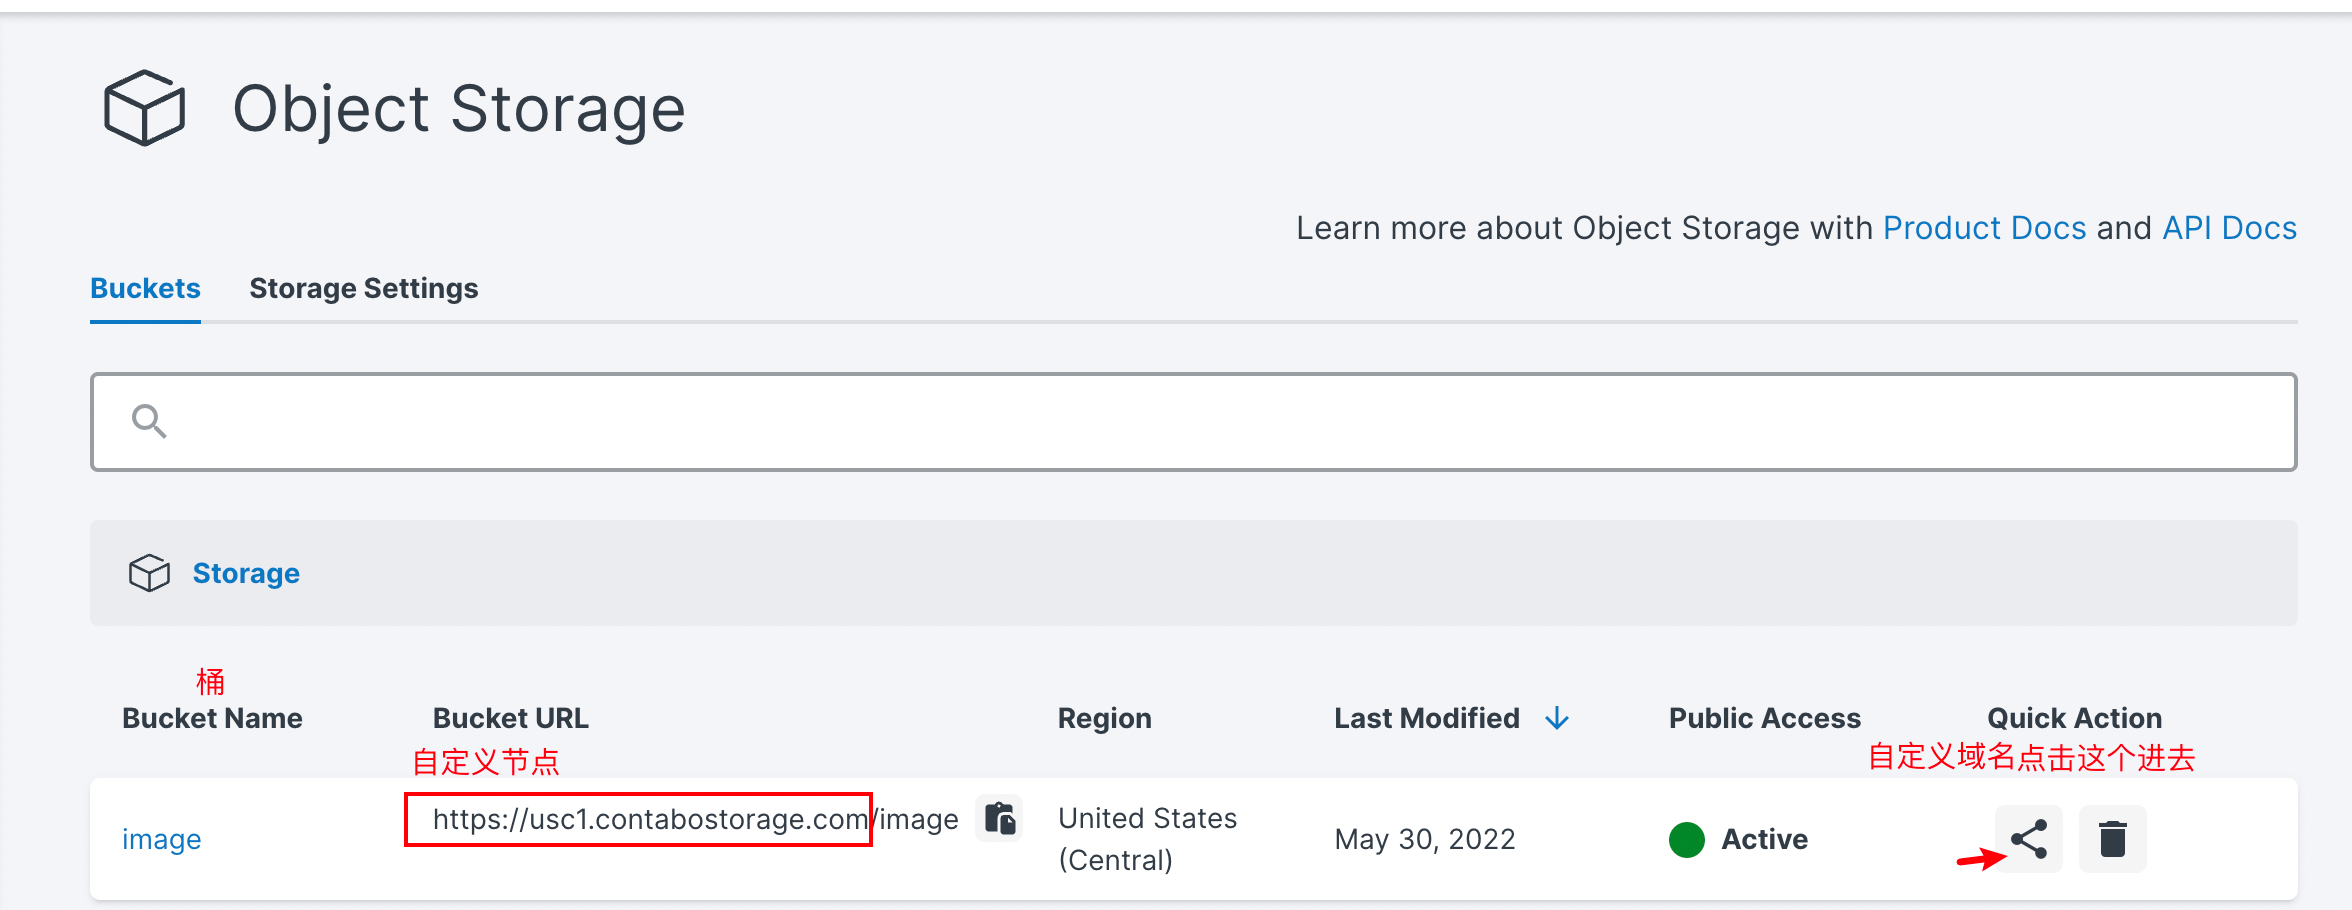
- **桶** → **Bucket Name**
|
||
- **自定义节点** → Bucket URL 中桶名字前的部分,比如这里就是`https://usc1.contabostorage.com`
|
||
|
||
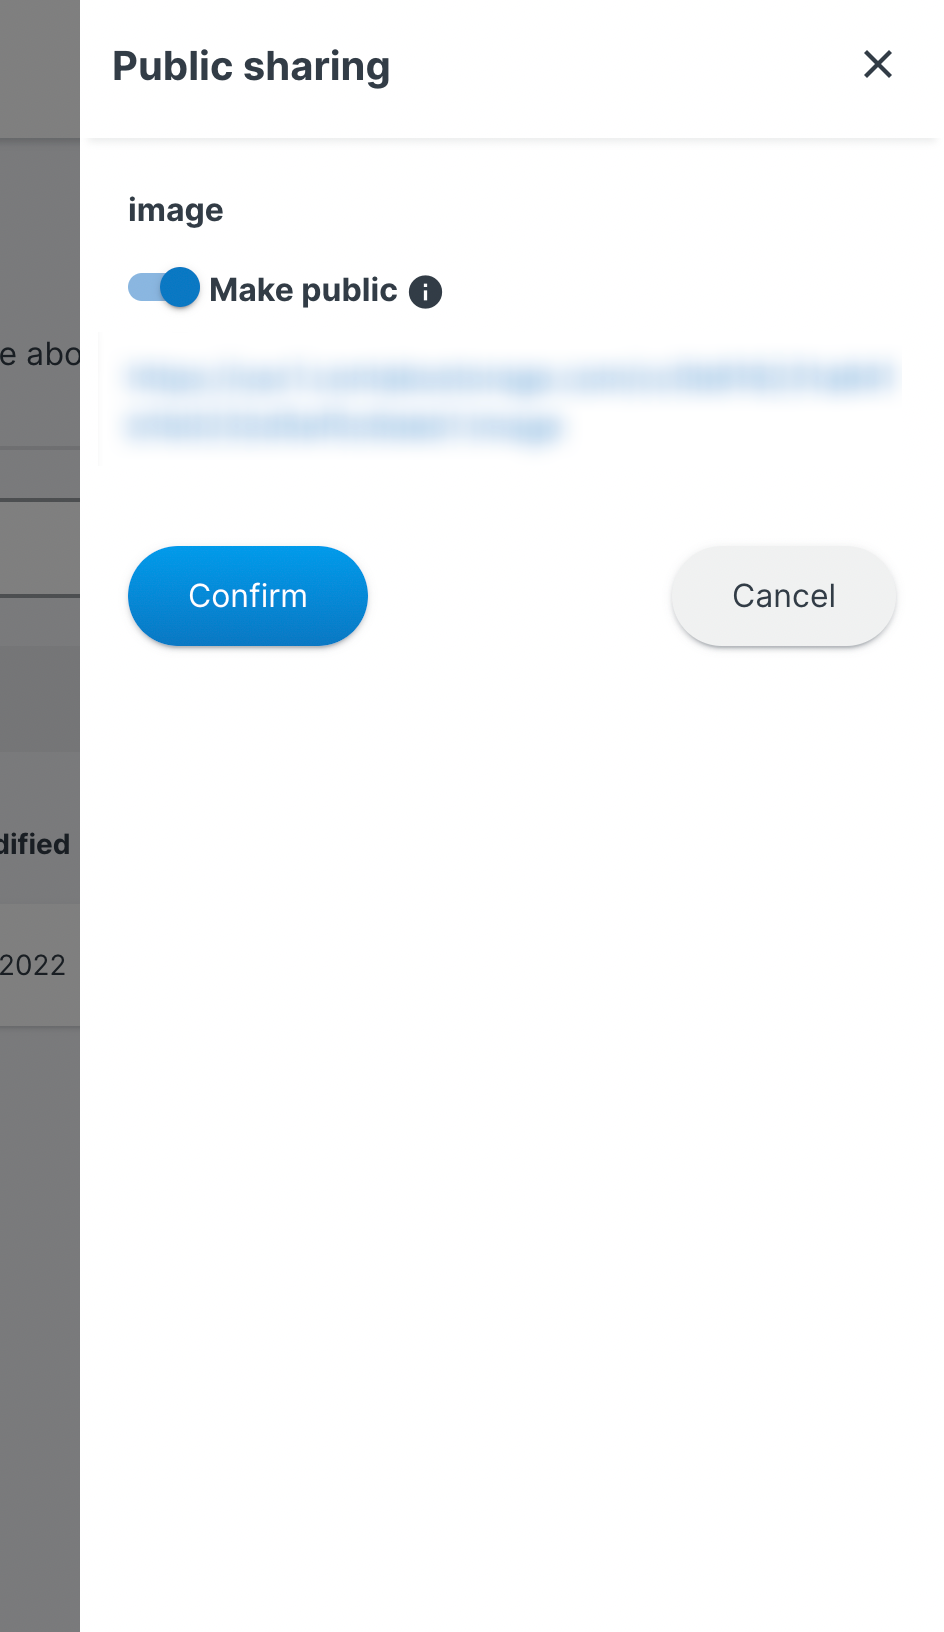
- **自定义域名**,需要先点击 Quick Action 里面的 Share 标志,打开 Public Sharing,然后里面的链接对应的就是设置里的自定义域名:
|
||
|
||
|
||
### 其他设置
|
||
|
||
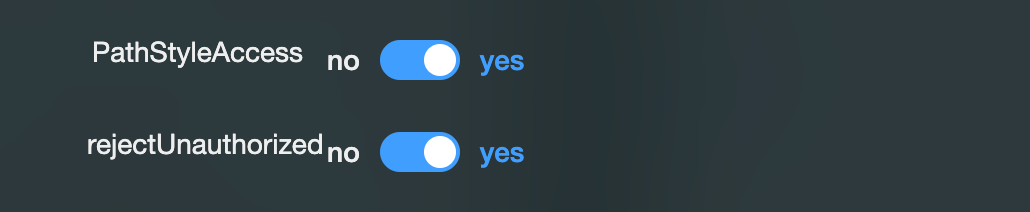
打开这两项:
|
||
|
||
|
||
然后文件路径对应的是 Bucket 里面存储文件的路径,具体的设置可以参照:[GitHub - wayjam/picgo-plugin-s3: PicGo S3 插件](https://github.com/wayjam/picgo-plugin-s3)
|
||
|
||
## 5. 其他
|
||
|
||
### Obsidian 中的图床设置
|
||
|
||
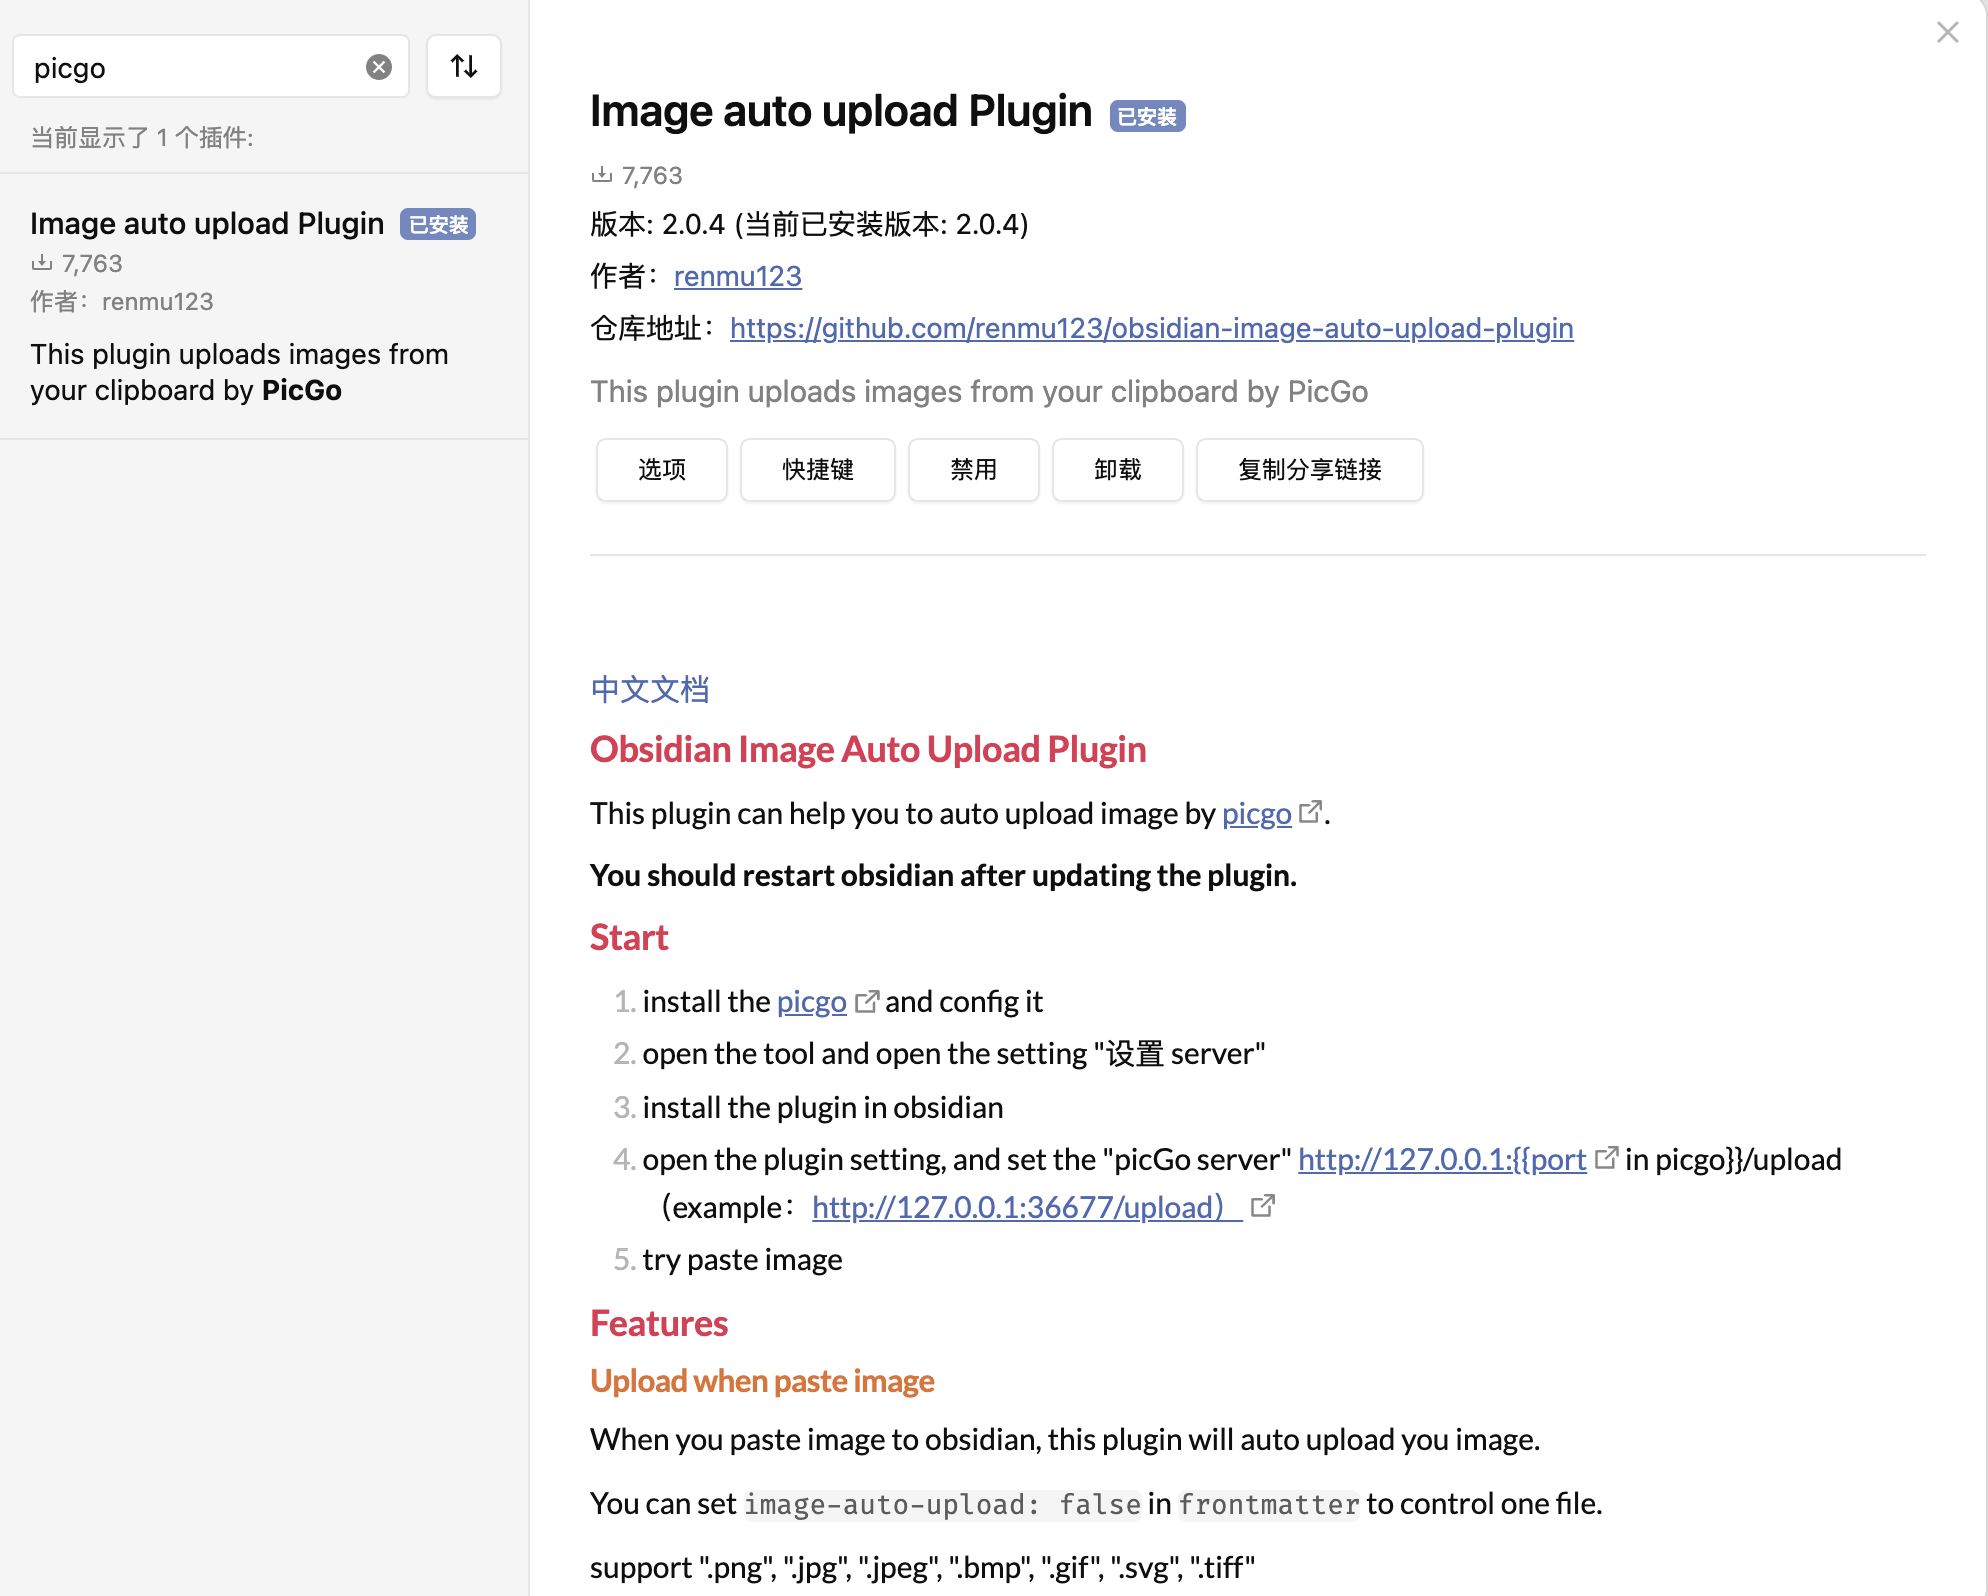
先安装这个`Image auto upload Plugin`插件:
|
||
|
||
|
||
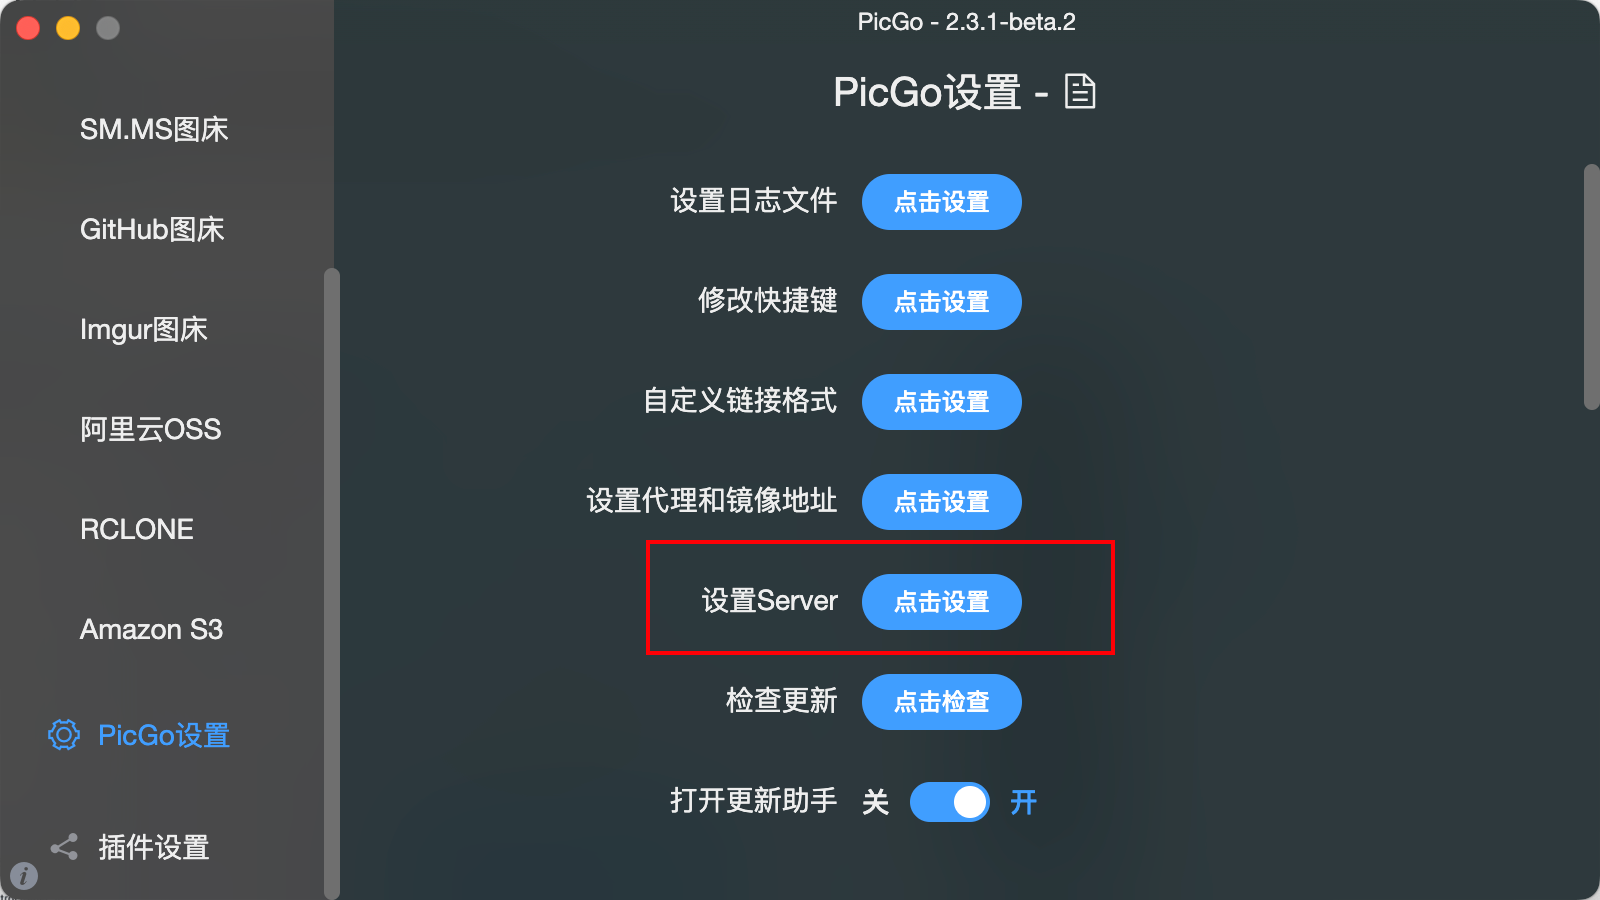
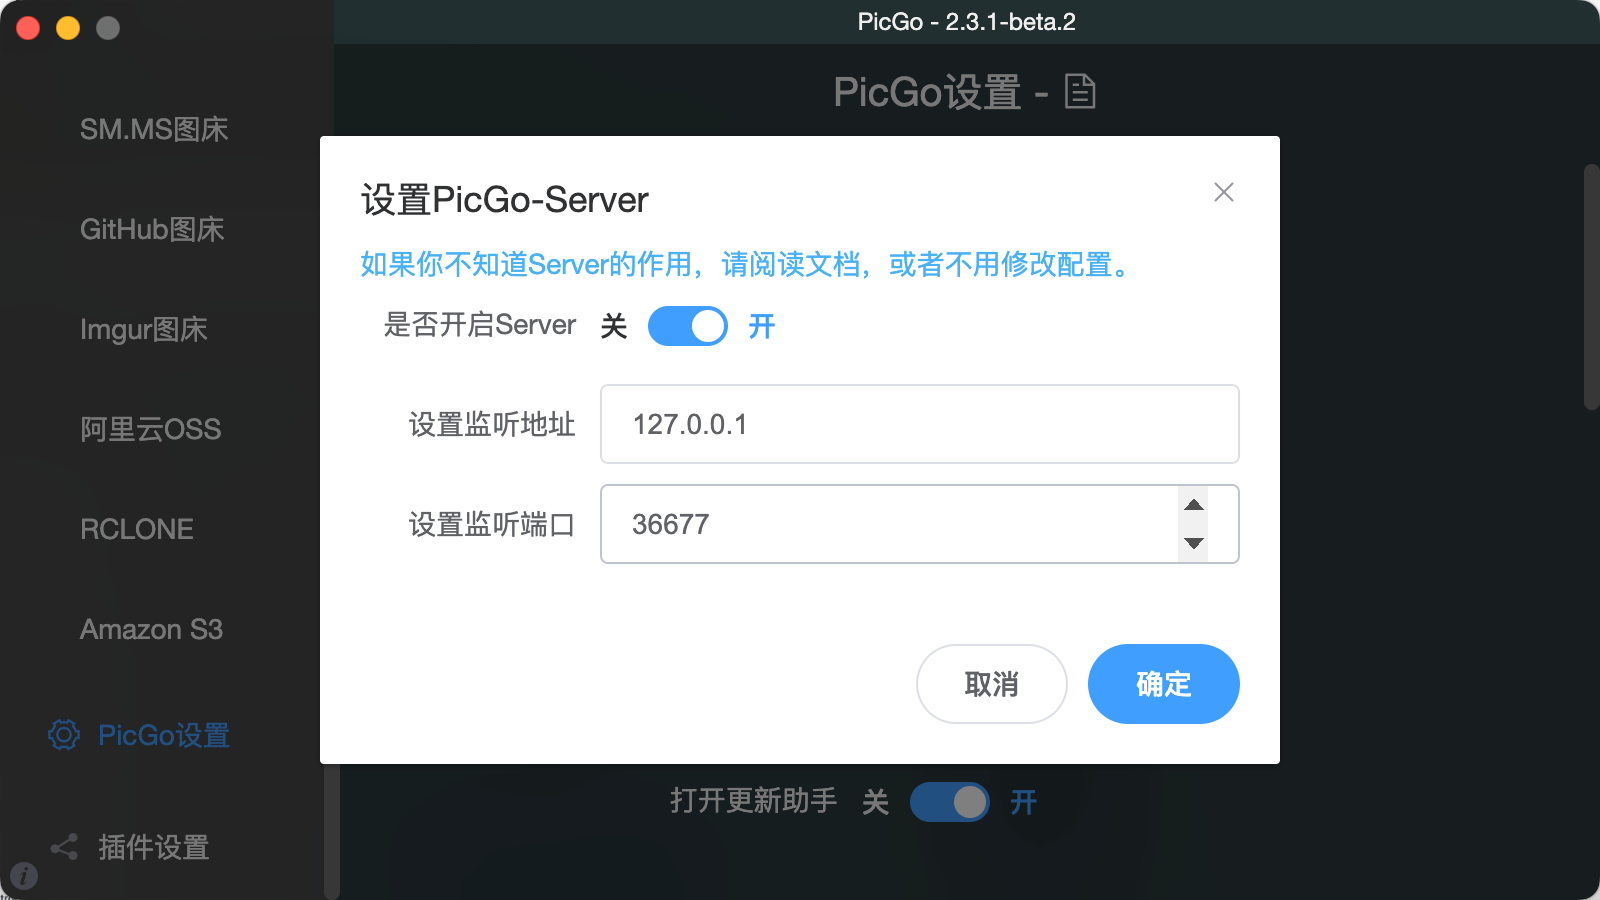
然后在 PicGo 设置里面 → **设置 Server**→ 打开 Server 开关
|
||
|
||
|
||
|
||
|
||
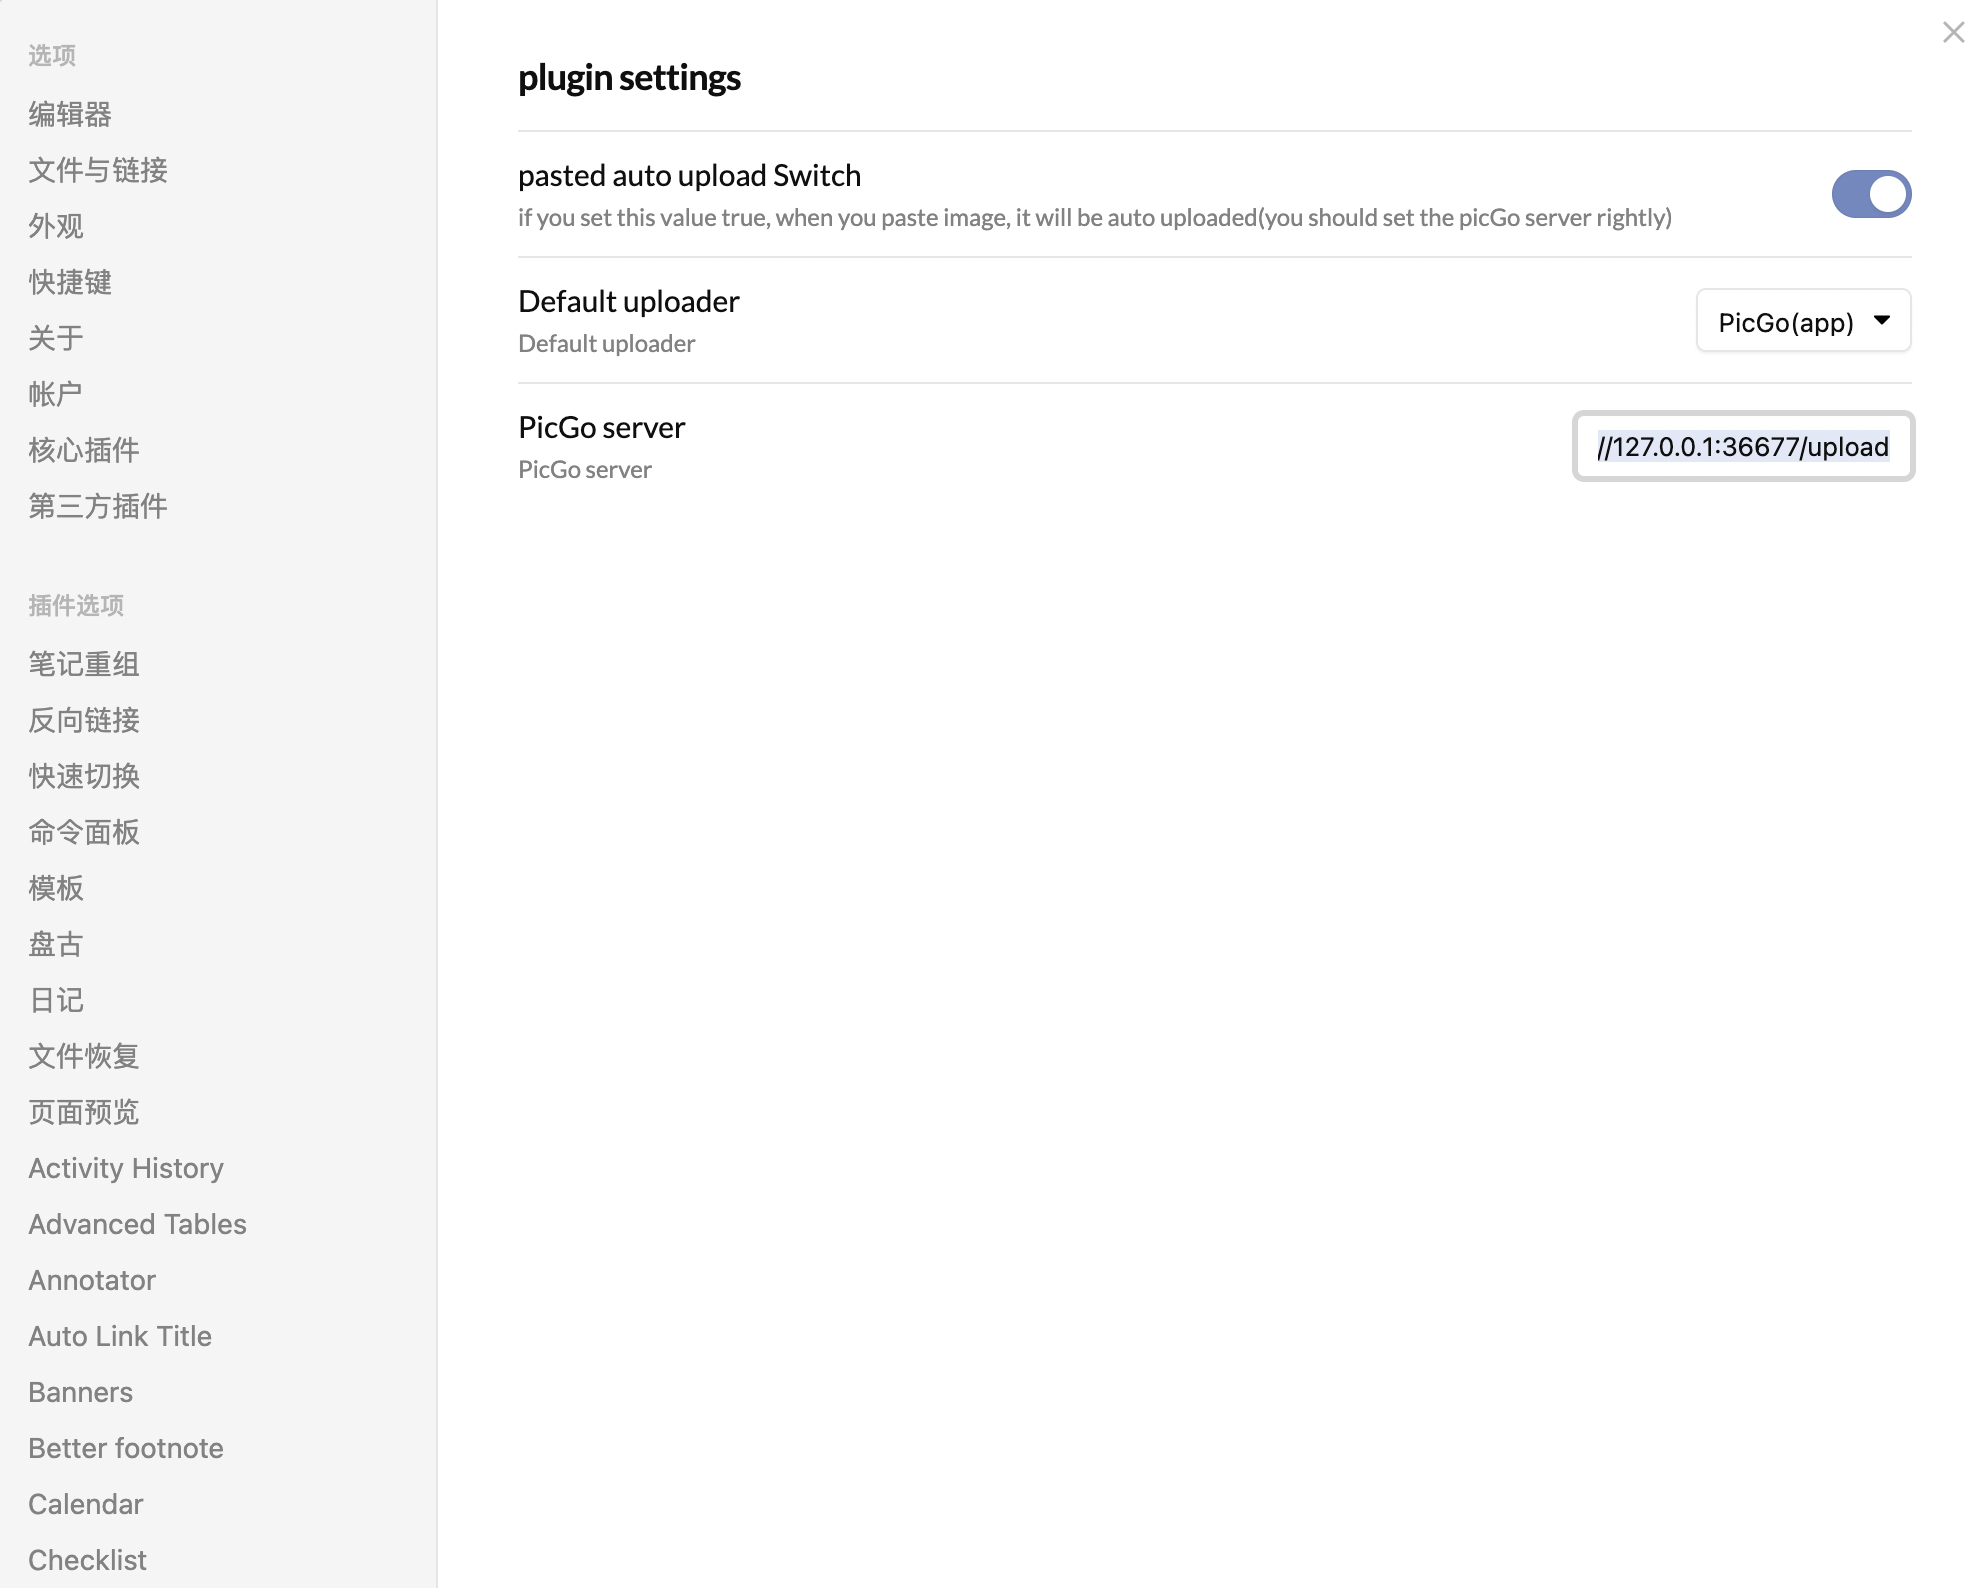
然后 Obsidian 插件中这样设置:
|
||
|
||
PicGo Server :`http://127.0.0.1:36677/upload`
|
||
|
||
端口号不一定是 36677,只要一一对应就好。
|
||
|
||
|
||
设置好后,在后台保持 PicGo 开启,就可以在 Obsidian 里面粘贴一键上传图床了~
|
||
|
||
### 更多 PicGO 插件:
|
||
|
||
[GitHub - PicGo/Awesome-PicGo: A collection of awesome projects using PicGo.](https://github.com/PicGo/Awesome-PicGo)
|
||
|
||
有图床备份、图片压缩、图床转移等插件,不过我都没有试过……
|