mirror of
https://github.com/Sevichecc/Urara-Blog.git
synced 2025-07-02 07:47:18 +08:00
129 lines
3.3 KiB
Markdown
129 lines
3.3 KiB
Markdown
---
|
||
title: VPS · 配置 Cloudflare 的免费 SSL 证书
|
||
created: 2022-06-12
|
||
summary: 关于如何为多个域名配置SSL证书的操作笔记
|
||
tags:
|
||
- Nginx
|
||
- VPS
|
||
---
|
||
|
||
声明:我不知道这样安不安全哈,It just works,个人笔记,操作有风险
|
||
|
||
参考:[申请 CloudFlare 免费 SSL 证书并应用到 nginx – 65536.io | 自娱自乐](https://65536.io/2020/03/607.html)
|
||
|
||
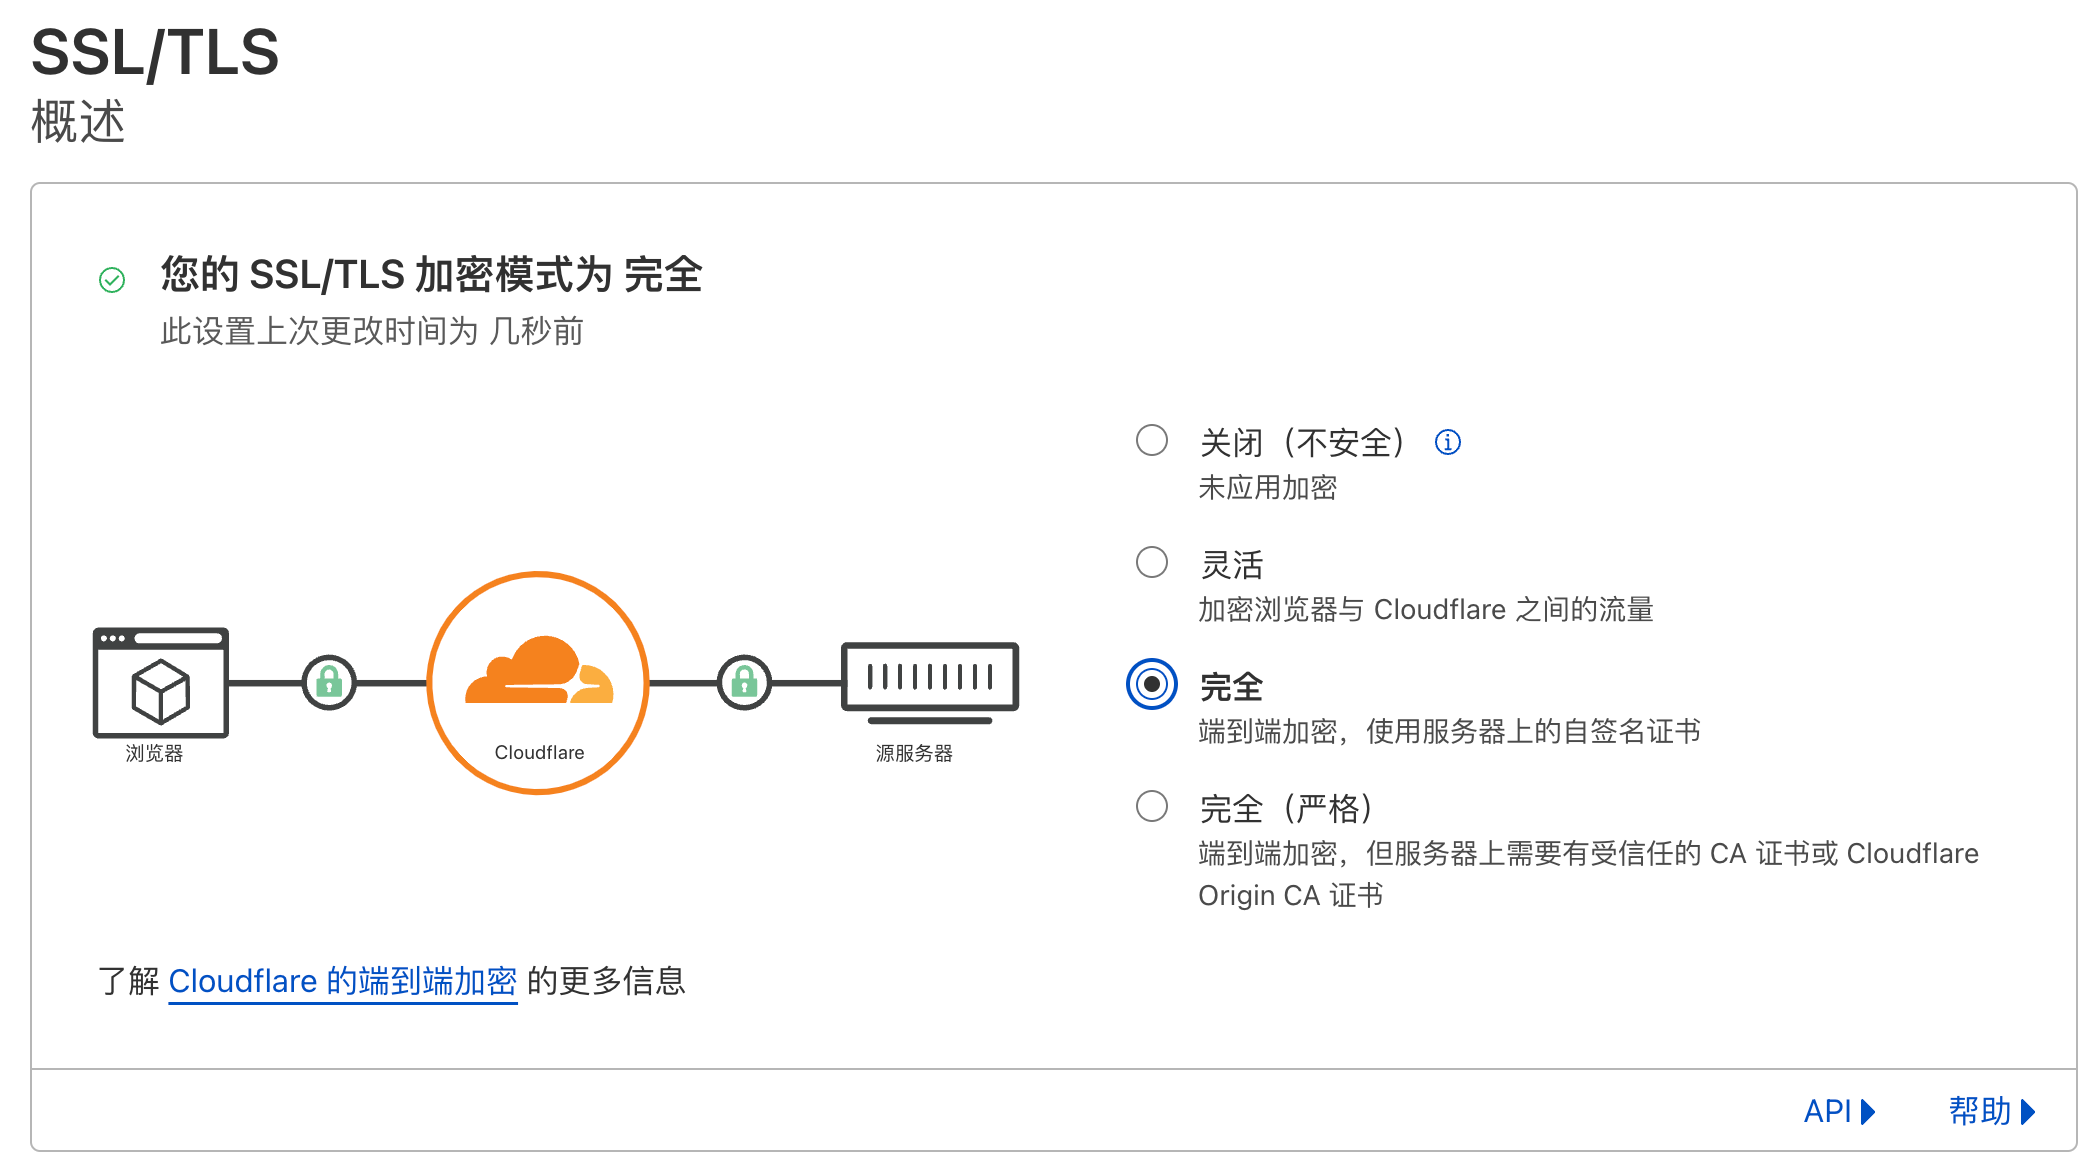
先设置加密方式为`完全` ,否则之后可能会出现 526 错误
|
||
|
||
|
||
|
||
## 1. 创建证书
|
||
|
||
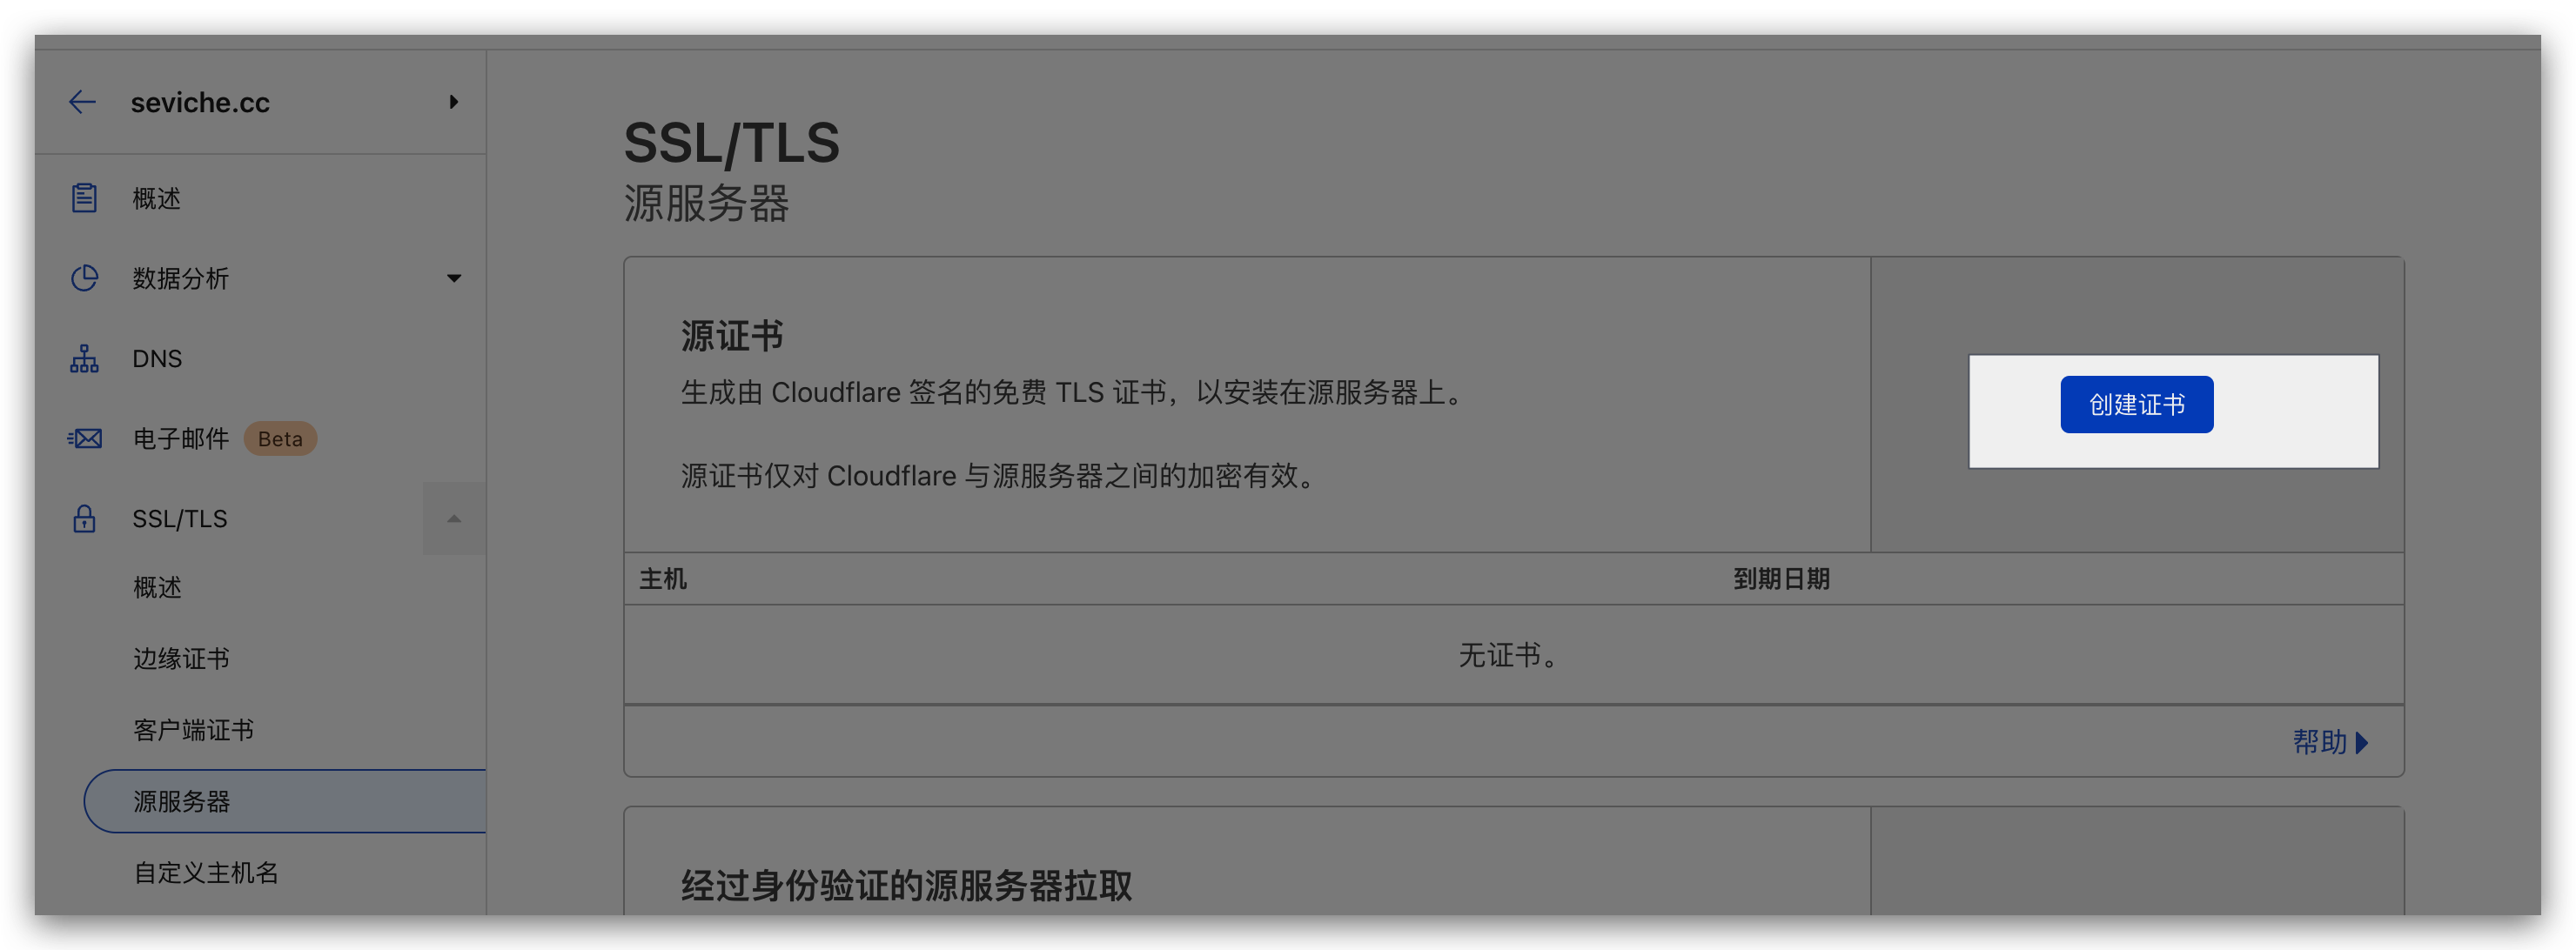
首先将主域名绑定到 Cloudflare,然后在`SSL/TLS` 下的源服务器证书处,点击`创建证书`
|
||
|
||
|
||
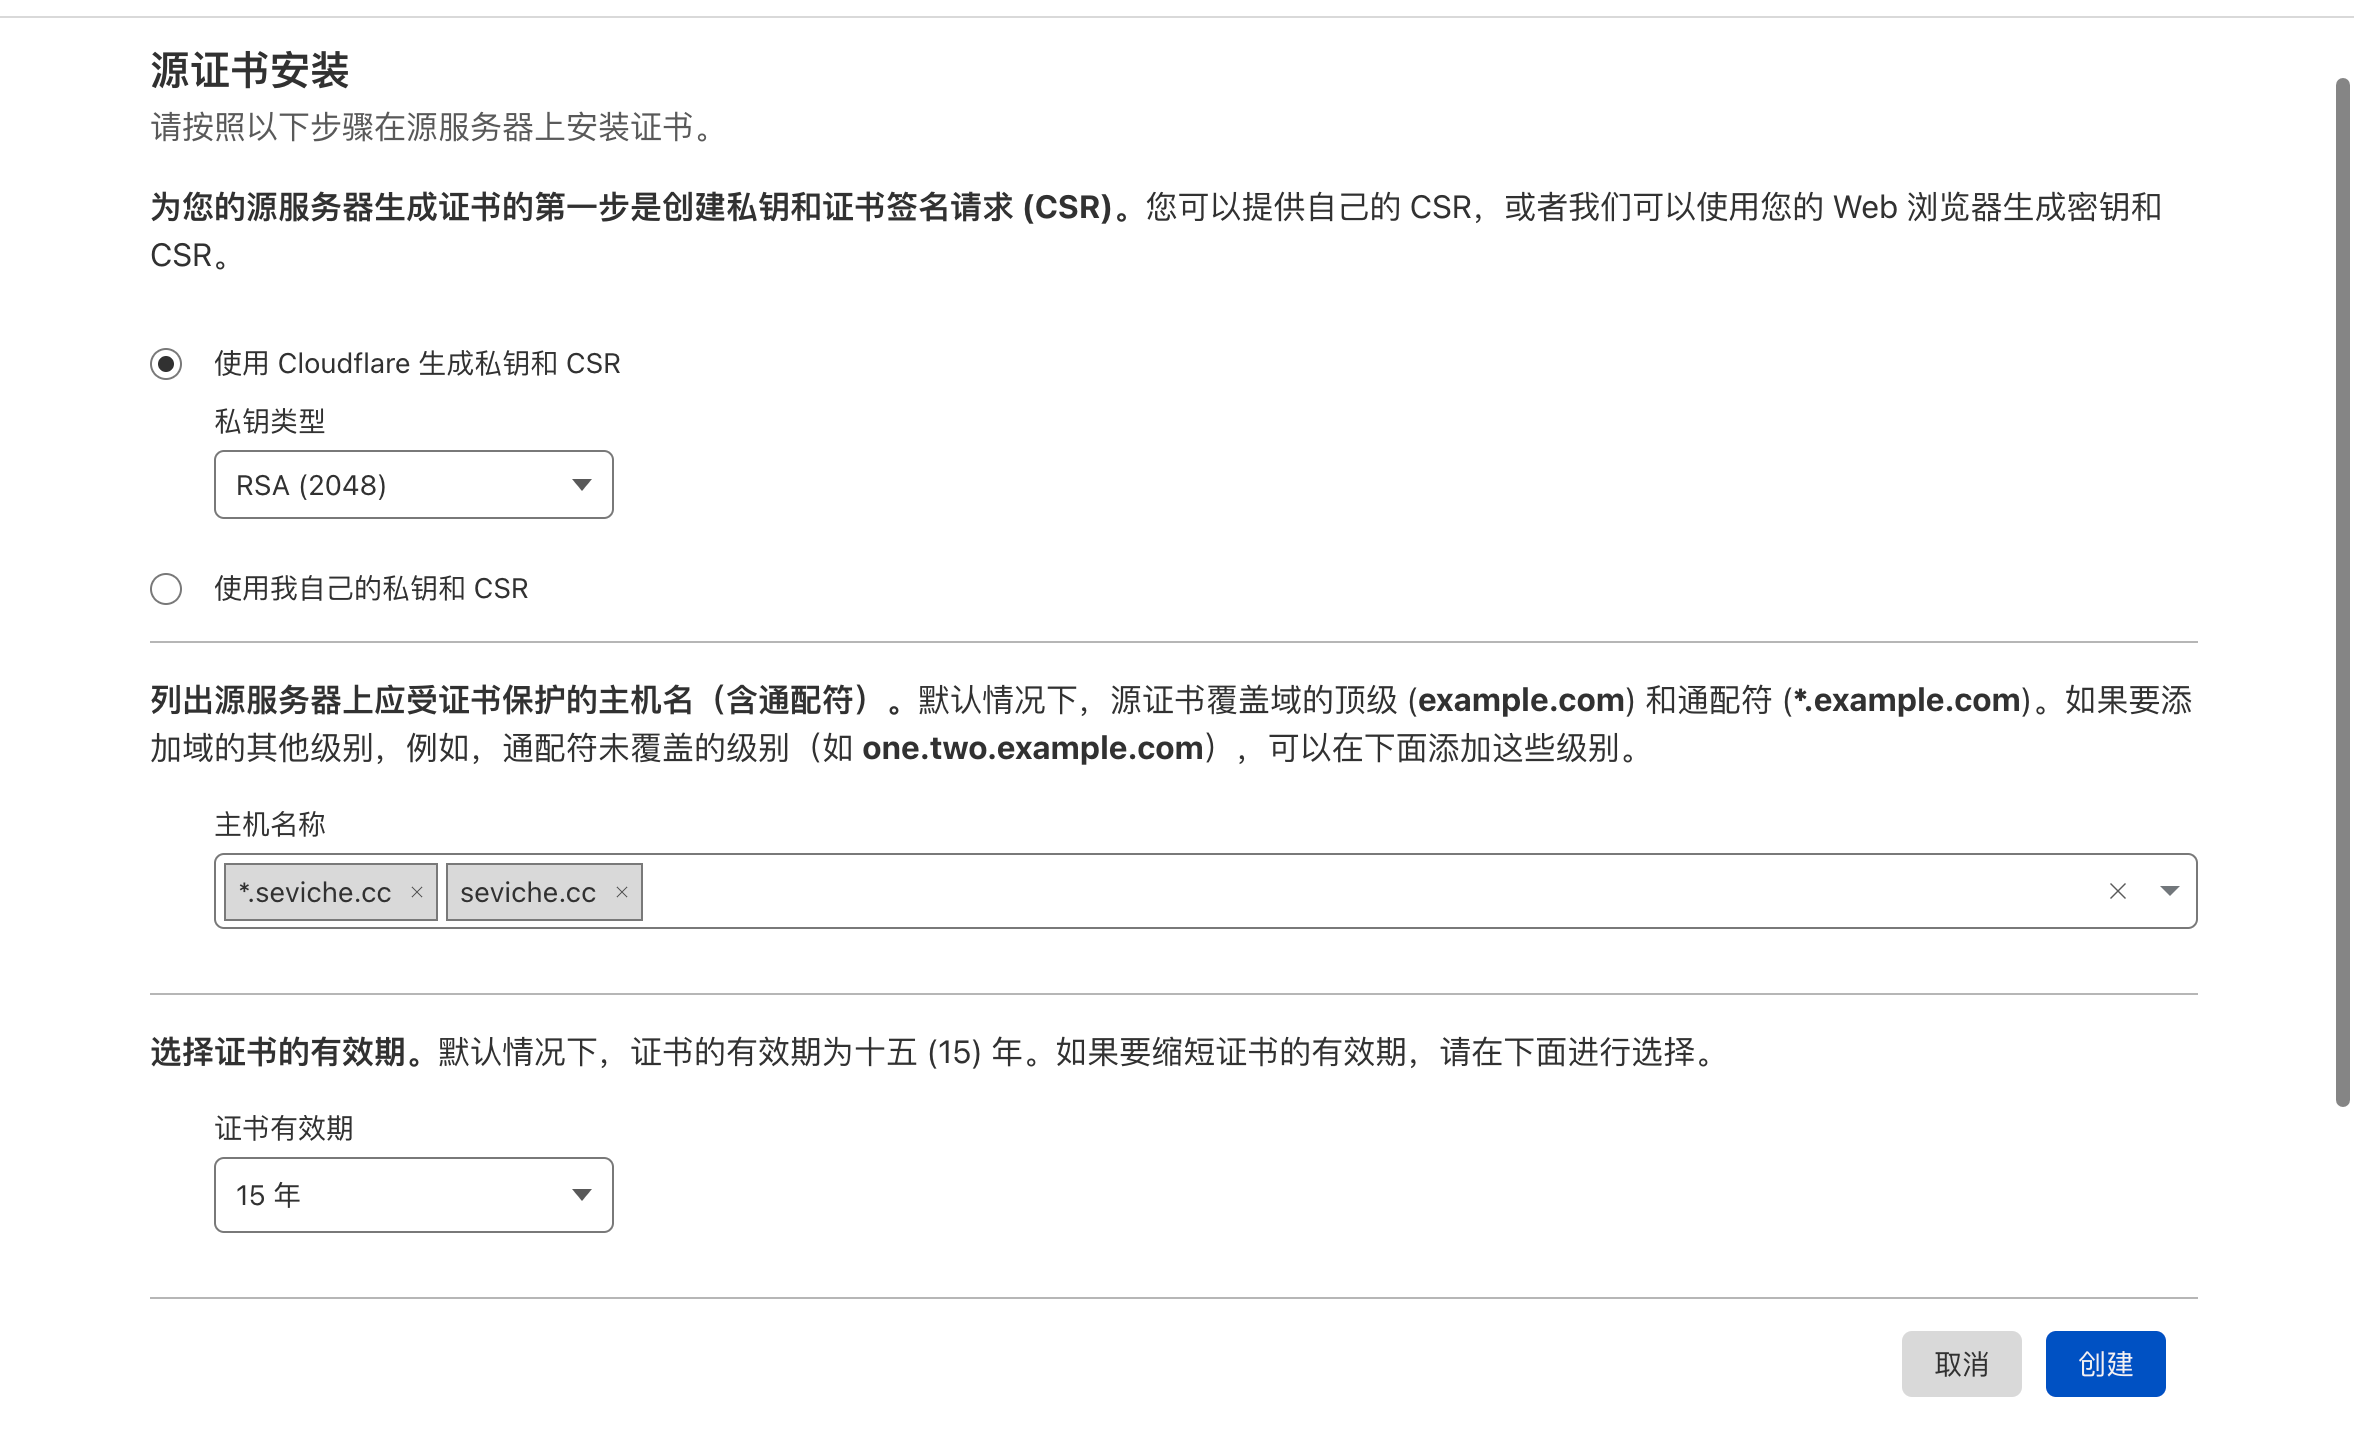
然后选择私钥和 CSR 生成方式,以及证书的有效期(也可以不改),点击`创建`
|
||
|
||
|
||
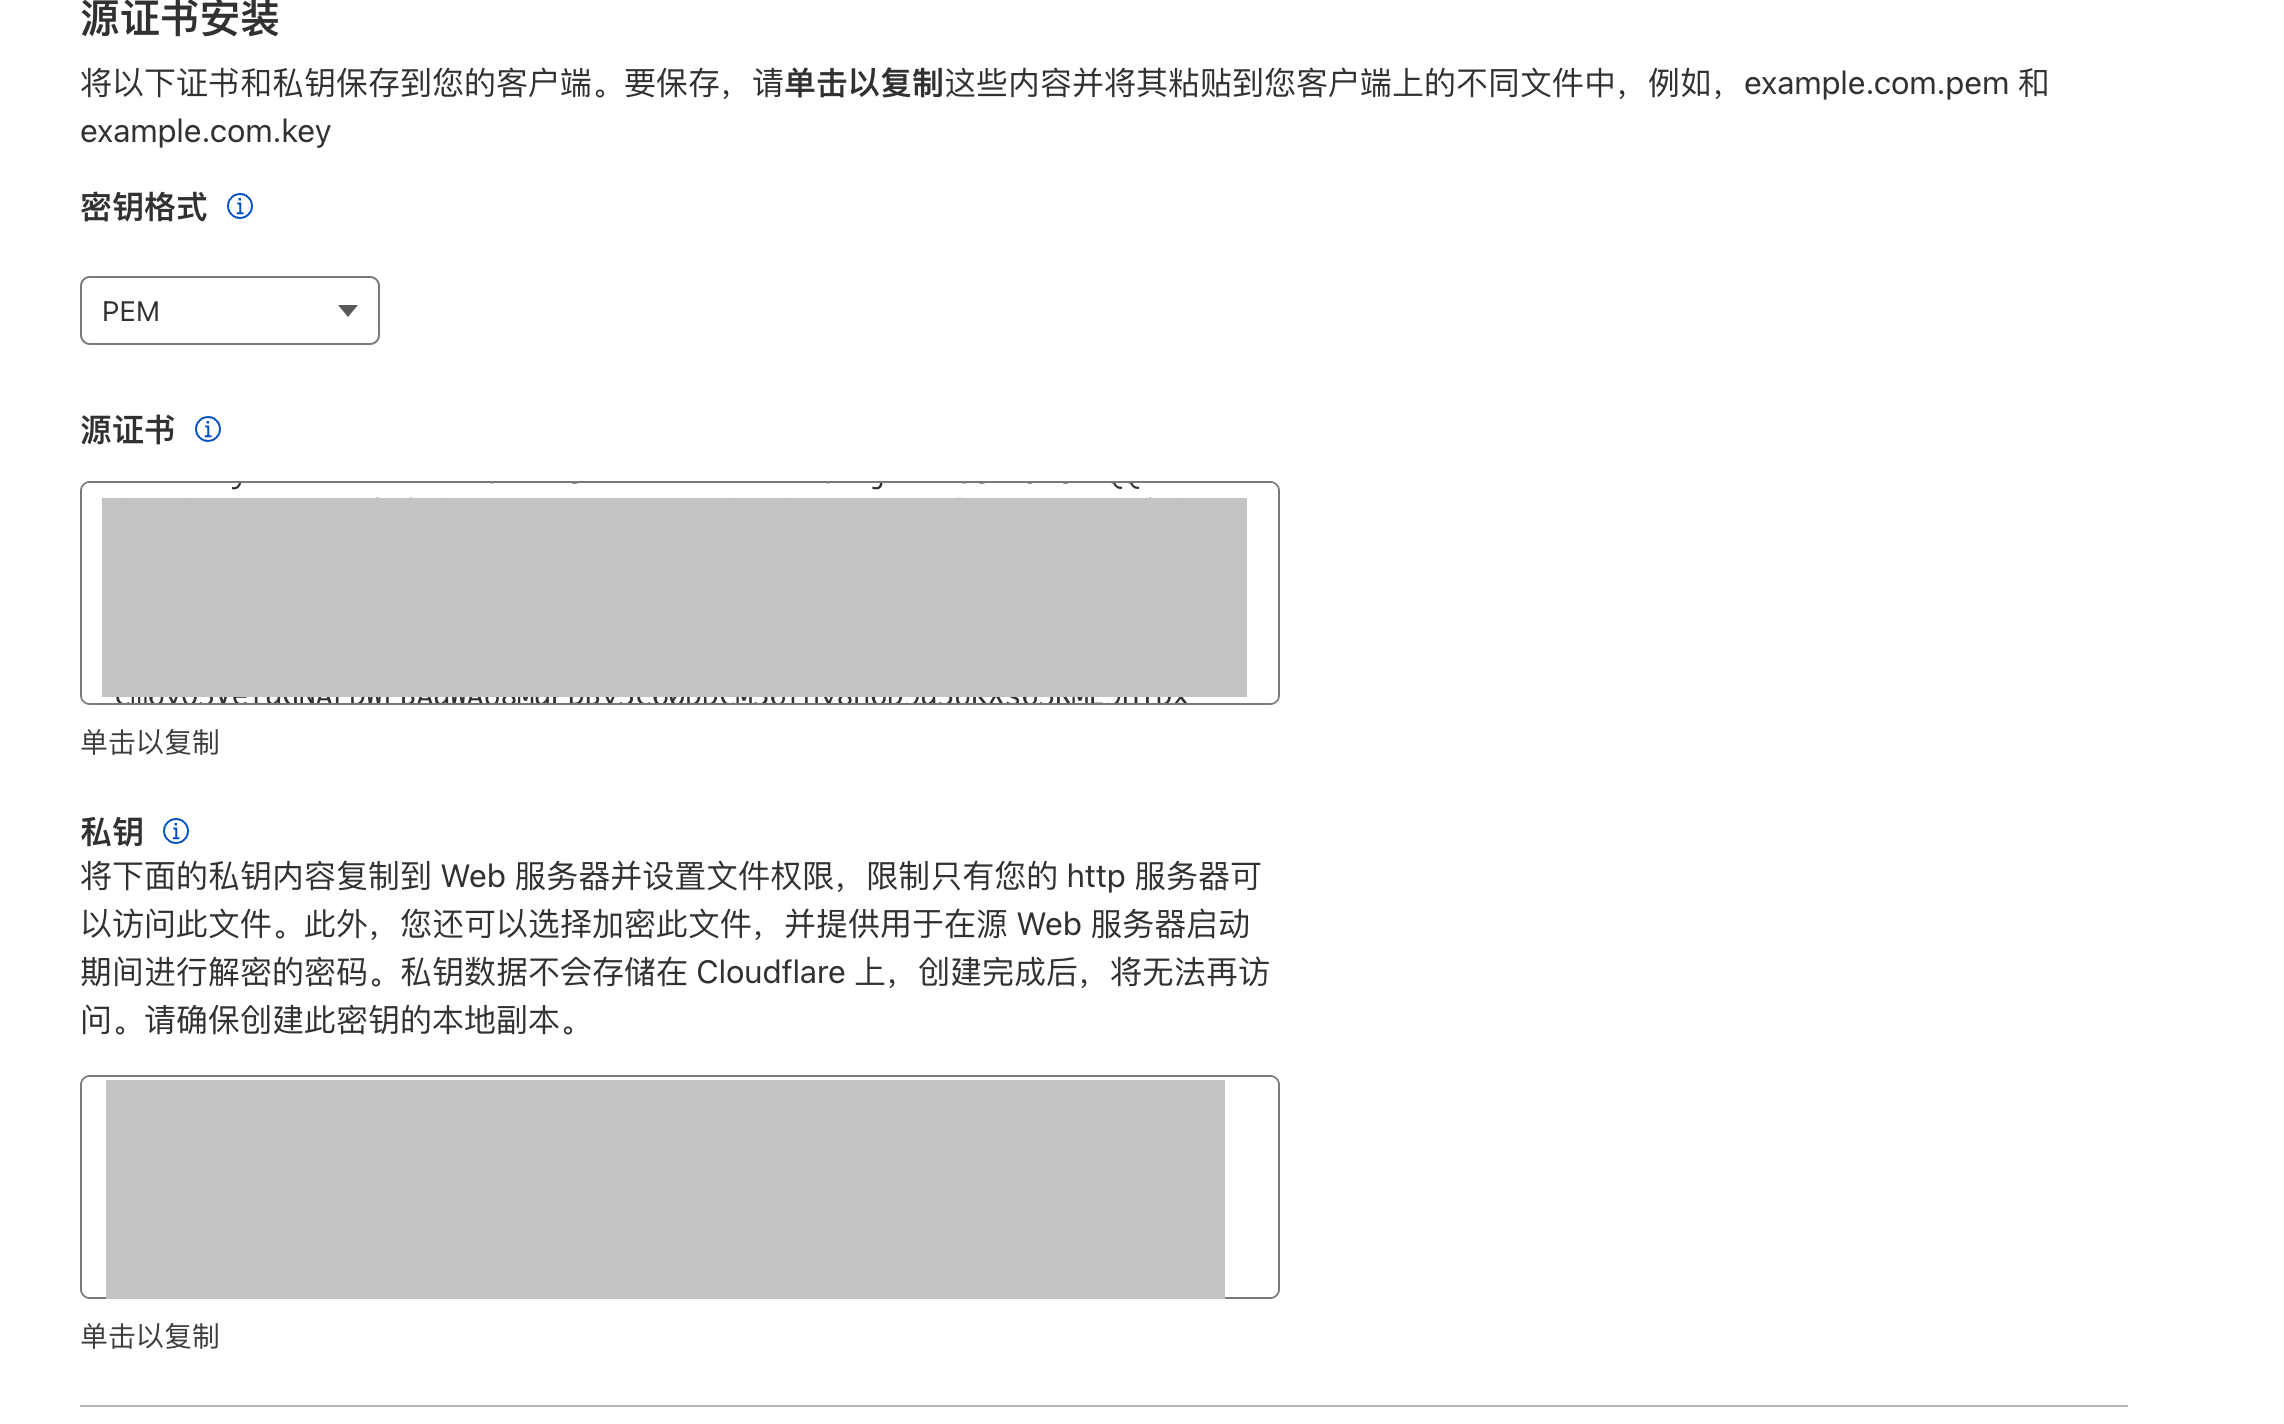
将下面的证书和私钥暂时复制到某个安全的地方,点击确定
|
||
|
||
|
||
## 2. 密钥上传到 VPS
|
||
|
||
连接 VPS 之后,创建一个文件夹存入密钥,我将其存到`/etc/nginx/cert/` 路径下
|
||
|
||
```bash
|
||
sudo mkdir /etc/nginx/cert && cd /etc/nginx/cert
|
||
```
|
||
|
||
写入证书,粘贴入刚刚保存的`证书` 栏里面的内容
|
||
|
||
```bash
|
||
sudo nano public.pem
|
||
```
|
||
|
||
修改权限
|
||
|
||
```bash
|
||
sudo chmod 644 public.pem
|
||
```
|
||
|
||
写入私钥,粘贴入刚刚保存的`私钥` 栏里面的内容
|
||
|
||
```bash
|
||
sudo nano private.key
|
||
```
|
||
|
||
修改权限
|
||
|
||
```bash
|
||
sudo chmod 600 private.key
|
||
```
|
||
|
||
## 3. 修改 Nginx 配置
|
||
|
||
参考:[How to Redirect HTTP to HTTPS in Nginx](https://phoenixnap.com/kb/redirect-http-to-https-nginx)
|
||
|
||
如果有用防火墙,请先打开 80 端口和 443 端口,不然可能会像我一样,卡在一个毫无意义的 522 Error 上 ^ ^
|
||
|
||
```bash
|
||
sudo ufw allow 80
|
||
sudo ufw allow 443
|
||
```
|
||
|
||
打开 Nginx 配置
|
||
|
||
```bash
|
||
sudo nano /etc/nginx/nginx.conf
|
||
```
|
||
|
||
在 http 块里面配置一个默认 server,将 http 重定向到 https
|
||
|
||
```bash
|
||
# 默认server
|
||
server {
|
||
listen 80 default_server;
|
||
server_name _;
|
||
return 301 https://$host$request_uri;
|
||
}
|
||
|
||
# ssl配置
|
||
server {
|
||
listen 443 ssl default_server;
|
||
server_name *.example1.com;
|
||
|
||
ssl_certificate /etc/nginx/cert/public.pem;
|
||
ssl_certificate_key /etc/nginx/cert/private.key;
|
||
}
|
||
|
||
# 如果有多个域名,可以这样配置,证书也要按之前的添加一下
|
||
server {
|
||
listen 443 ssl;
|
||
server_name *.example2.com;
|
||
|
||
ssl_certificate /etc/nginx/cert/example2/public.pem;
|
||
ssl_certificate_key /etc/nginx/cert/example2/private.key;
|
||
}
|
||
```
|
||
|
||
然后`sudo nginx -t` 测试一下,没有问题的话就可以 Nginx 了:
|
||
|
||
```bash
|
||
sudo systemctl reload nginx
|
||
```
|
||
|
||
之后如果有域名要配置 ssl ,如 example.conf 中,可以直接将 `listen 80` 改为`listen 443 ssl`
|
||
|
||
我常用的一个反代配置:
|
||
|
||
```conf
|
||
server {
|
||
listen 443 ssl;
|
||
server_name 域名
|
||
location / {
|
||
proxy_pass http://127.0.0.1:反代端口;
|
||
proxy_set_header HOST $host;
|
||
proxy_set_header X-Forwarded-Proto $scheme;
|
||
proxy_set_header X-Real-IP $remote_addr;
|
||
proxy_set_header X-Forwarded-For $proxy_add_x_forwarded_for;
|
||
}
|
||
}
|
||
```
|